Use Kasten K10 to migrate K8s Volumes to Pure Storage

TL;DR – Move Kubernetes volumes from legacy storage to Pure Storage.

So you have an amazing new Pure Storage array in the datacenter or in public cloud. The Container Storage Interface doesn’t provide a built in way to migrate data between backend devices. I previously blogged about a few ways to clone and migrate data between clusters but the data has to already be located on a Pure FlashArray.

Lately, Pure has been working with a new partner Kasten. While more is yet to come. Check out this demo (just 5:30) and see just how easy it is to move PVC’s while maintaining the config of the rest of the k8s application.

Demo EBS to CBS (this could be used to migrate off other devices too)

This demo used EKS in AWS for the Kubernetes cluster.

  1. Application initially installed using a PVC for MySQL on EBS.
  2. Kasten is used to backup the entire state of the app with the PVC to S3. This target could be a FlashBlade in your datacenter.
  3. The application is restored to the same namespace but a Kasten Transform is used to convert the PVC to the “pure-block” StorageClass.
  4. Application is live and using PSO for the storage on Cloud Block Store.

Why

Like the book says, “End with why”. Ok maybe it doesn’t actually say that. Let’s answer the “why should I do this?”

First: Why move EBS to CBS
This PVC is 10GB on EBS. At this point in time it consumes about 30MB. How much does the AWS bill on the 10GB EBS volume? 10GB. On Cloud Block Store this data is reduced (compressed and deduped) and thin provisioned. How much is on the CBS? 3MB in this case. Does this make sense for 1 or 2 volumes? Nope. If your CIO has stated “move it all to the cloud!” This can be a significant savings on overall storage cost.

Second: Why move from (some other thing) to Pure?
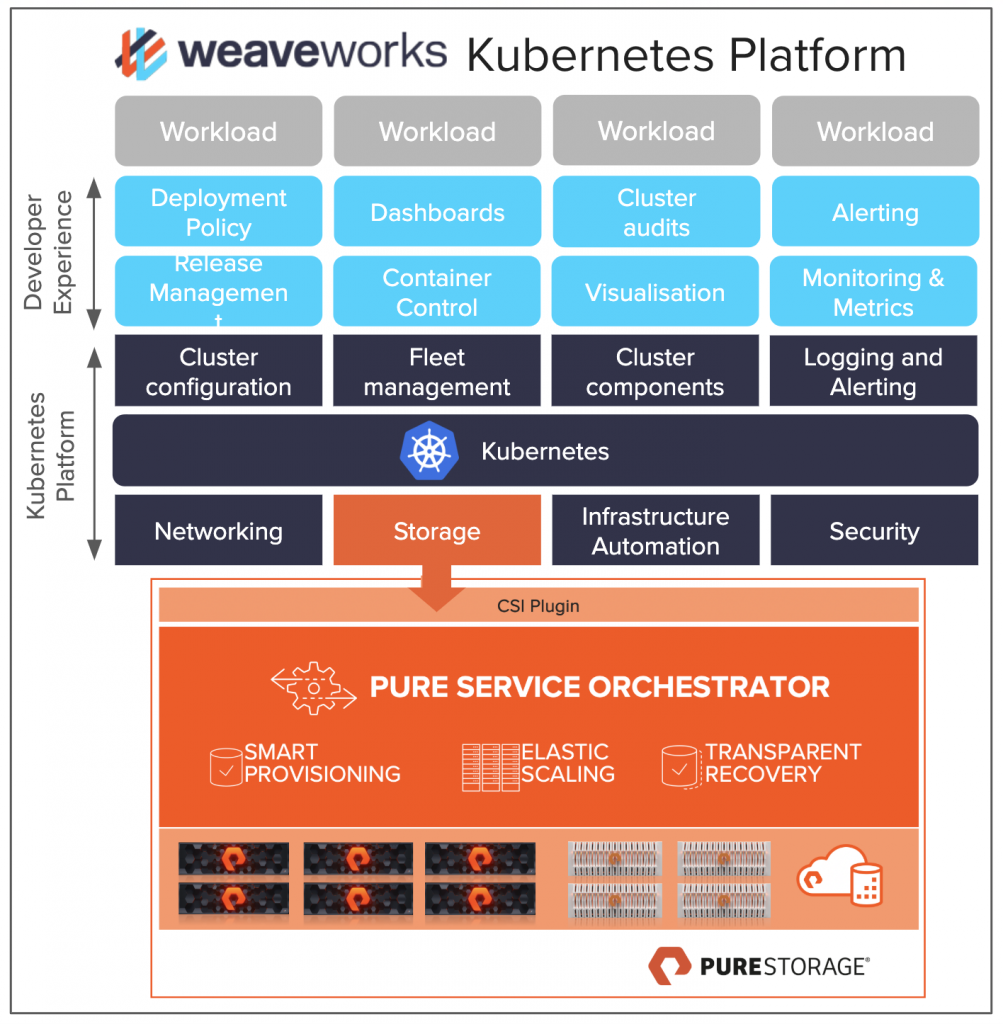
I am biased to PSO for Kubernetes so I will start there and then give a few bullets of why Pure, but this isn’t the sales pitch blog. Pure Service Orchestrator allows you a simple single line to install and begin getting storage on demand for your container clusters. One customer says, “It just works, we kind of forget it is there.” and another commented, “I want 100GB of storage for my app, and everything else is automated for me.”

Why Pure?

  • Efficiency – Get more out of the all-flash, higher dedupe with no performance penalty does matter.
  • Availability – 6×9’s uptime measured across our customer base, not an array in a validation lab. Actual customers love us.
  • Evergreen – never. buy. the same TB/GB/MB again.

Hey, Don’t break EBS

TL;DR – EBS Volumes fail to mount when multipathd is installed on EKS worker nodes.

EKS and PSO Go Great together!

AWS Elastic Kubernetes Service is a great way to dive in with managed Kubernetes in the cloud. Pure Service Orchestrator integrates EKS worker nodes into the Cloud Block Store on AWS. I created this ansible playbook to make sure the right packages and services are started on my worker nodes.

---
- hosts: all
  become: yes
  tasks:
  - name:    Install prerequisites
    yum:     
      name: ['iscsi-initiator-utils', 'device-mapper-multipath']
      update_cache: yes
  - name:    Create directories
    file:
      path: "{{ item }}"
      state: directory
      mode: 0755
    with_items:
      - /etc/multipath
  - name: Copy file with owner and permissions
    copy:
      src: ./multipath.conf
      dest: /etc/multipath.conf
      owner: root
      group: root
      mode: '0644'
  - name: REstart iscsid
    service:
      name: iscsid
      state: restarted
  - name: REstart multipathd
    service:
      name: multipathd
      state: restarted

In my previous testing with PSO and EKS I was basically focused on using PSO only. Recently the use case of migrating from EBS to CBS has shown to be pretty valuable to our customers in the cloud. To create the demo I used an app I often use for demoing PSO. It is 2 Web server containers attached to a mySQL container with a persistent volume. Very easy. I noticed though as I was using the built in gp2 Storage Class it started behaving super odd after I installed PSO. I installed the AWS EBS CSI driver. Same thing. It could not mount volumes or snapshot them in EBS. PSO volumes on CBS worked just fine. I figure most customers don’t want me to break EBS.

After digging around the internet and random old Github issues there was no one thing seemingly having the same issue. People were having problems that had like 1 of the 4 symptoms. I decided to test when in my process it broke after I enabled the package device-mapper-multipath. So it wasn’t PSO as much as a very important pre-requisite to PSO causing the issue. What it came down to is the EBS volumes were getting grabbed by multipathd and the Storage Class didn’t know how to handle the different device names. So I had to find how to use multipathd for just the Pure volumes. The right settings in multipath.conf solved this. This is what I used as an example:

blacklist {
    device {
        vendor "*"
    }
}
blacklist_exceptions {
    device {
        vendor "PURE"
        product "*"
    }
}

I am telling multipathd to ignore everything BUT Pure. This solved my issue. So I saved this into the local directory and added the section in the ansible playbook to copy that file to each worker node in EKS.
1. Copy the ansible playbook above to a file prereqs.yaml
2. Copy the above multipath blacklist settings to multipath.conf and save to the same directory as prereqs.yaml
3. Run the ansible playbook as shown below. (make sure the inventory.ini has IP’s and you have the SSH key to login to each worker node.

# Make sure inventory.ini has the ssh IP's of each node. 
# prereqs.yaml includes the content from above

ansible-playbook -i inventory.ini -b -v prereqs.yaml -u ec2-user

This will install the packages, copy multipath.conf to /etc and restart the services to make sure they pick up the new config.

What’s new in PSO 5.1 and 5.2

This is mainly just a post to refer to the updates I shared on the main Pure Storage blog.

Check out the blog!

BTW… saw this photo from Dockercon 2017, we have come a long way with PSO. Also my beard has come a long way. Can’t believe it has been 3 years.

Dockercon April 2017

Kubernetes Topology for StatefulSet Storage Redundancy with PSO

  1. Label your hosts.
  2. Install PSO with Labels
  3. Set your StorageClass to use WaitForFirstConsumer
  4. Set the StatefulSet to schedule pods for a “nodeSelector”.

For the full “walkthrough” please see the demo content on GitHub.
https://github.com/2vcps/pso-topology-crdb

It would be great to hear how this works for you and how it can solve your Cloud Native Database requirements.

Upgrading K8s to 1.17.4 and PSO to 5.1.0

This morning I needed to upgrade one of my dev clusters to 1.17.4. I decided to capture the experience. Don’t worry I speed up the ansible output flying by

I use Kubespray to deploy and upgrade my clusters. I didn’t do anything really to prepare. All of my clusters I can rebuild pretty easy from Terraform if anything breaks.

git clone git@github.com:kubernetes-sigs/kubespray.git
cd kubespray
## Make sure you copy your actual inventory. For more information see the kubespray github repo
ansible-playbook -i inventory/dev/inventory.ini -b -v upgrade-cluster.yaml
Take some time and upgrade

Watch it go for about 40 minutes in my case. Remember this is a dev cluster and the pods I have running can restart all they want. I don’ t care. Everything upgrades through the first part of the video. Now lets upgrade Pure Service Orchestrator.

helm upgrade -n pure-csi pso pure/pure-csi -f dev-values.yaml

Done.

Now if you watch the video you will notice I had to add the Pure Storage helm repo. This was a new jump box in the lab. So I had PSO installed just not from this actual host. It is easy to add. More details are in the Pure Helm Chart README.

Migrating K8s Stateful Apps with Pure Storage

I have to move my harbor instance to a new cluster.

  1. old cluster – find all the PVC’s
kubectl -n harbor get pvc
NAME                                     STATUS   VOLUME                                     CAPACITY   ACCESS MODES   STORAGECLASS   AGE
data-harbor-harbor-redis-0               Bound    pvc-aebe5589-f484-4664-9326-03ff1ffb2fdf   5Gi        RWO            pure-block     24m
database-data-harbor-harbor-database-0   Bound    pvc-b506a2d4-8a65-4f17-96e3-f3ed1c25c56e   5Gi        RWO            pure-block     24m
harbor-harbor-chartmuseum                Bound    pvc-e50b2487-2a88-4032-903d-80df15483c37   100Gi      RWO            pure-block     24m
harbor-harbor-registry                   Bound    pvc-923fa069-21c8-4920-a959-13f7220f5d90   200Gi      RWO            pure-block     24m
  1. clone in the FlashArray
    Find each PVC listed when you run the above command, you may either create a snapshot or a full clone.
  2. Bring up the new app with the same sized PVC’s on your new cluster.
kubectl -n harbor scale deployment --replicas 0 -l app=harbor
  1. scale app to 0 replicas on the new k8s cluster (example above)
  2. Clone and overwrite each volume on the FlashArray. Using the pvc volume name from the new cluster.
kubectl -n get pvc

  1. Scale app back to the required replicas. Verify it works.
kuebctl -n harbor scale deployment --replicas 1 -l app=harbor
  1. Point DNS to new loadbalancer/ingress
kubectl -n harbor get ingresses
NAME                    HOSTS                                         ADDRESS         PORTS     AGE
harbor-harbor-ingress   harbor.newstack.local,notary.newstack.local   10.xx.xx.xx  80, 443   32m

Change DNS to the new cluster.

All my data is now migrated

Kubespray and vSphere VMs

I build and destroy Kubernetes clusters nearly weekly. Doing it on VMs makes this super easy. I also need to demo Pure Service Orchestrator so having in guest iSCSI is a must. Following this repo should give any vSphere admin an easy way to learn kubectl, helm and PSO quite easily (of course PSO works with Pure FlashArray and FlashBlade). This uses Terraform to create the VM and Kubespray to install k8s. Ansible can also be used for a few automations of package installs and updates.

I am going to try something new and not recreate the github readme and just share the repo link.

https://github.com/2vcps/tf4vsphere

Pure Storage and Weaveworks Webinar – March 17

I am pretty excited to be doing a webinar with Weaveworks on Weave Kubernetes Platform and Pure Storage. I met Damani at Kubecon and Re:Invent and we have been talking about doing this for months. I am excited to integrate Pure Service Orchestrator and Pure Storage into a platform providing a full collection of what you need to run k8s. Some things we will cover:

  • How the Weave Kubernetes Platform and its GitOps workflows unify deployment, management, and monitoring for clusters and apps
  • How Pure Service Orchestrator accelerates application build and delivery with 6 9’s storage uptime. PSO works for ON PREM and Public Cloud
  • Live Demo – I am going to show some CSI goodness. Promise.
How does Pure make Stateful Apps a no brainer?

Use this link to register now!

Some other important questions you might have from this pic:

When did JO’s beard explode into this?

JO from Pure Storage’s North Georgia foothills HQ

Building the Python Twitter Bot with Jenkins and Kubernetes – part 3

This is the third part of the blogs I have been writing to document building a Python based twitter bot and running it in a container and deploying it to Kubernetes. The first post was about building the python, the second was all about building the docker container and using a deployment in Kubernetes. This last part pulls it all together and lets Github, Jenkins and Kubernetes do the work for you.

Getting Started

Pre-requisites:

  1. Working Kubernetes Cluster
  2. Working Container Registry and your Kubernetes cluster is able to pull images from it.
  3. Jenkins and a service account Jenkins can use to do things in K8s.

Jenkinsfile

Go ahead and fork my repo https://github.com/2vcps/python-twitter-bot to your own github account.
Now looking at the Jenkinsfile below inside of the repo. Some things for your to modify for your environment.

  1. Create a serviceAccount to match the serviceAccountName field in the yaml. This is the permissions the pod building and deploying the bot will use to run during the process. If you get this wrong. There will be errors.
  2. make the the images in the file all exist in your private registry. The first image tag you see is used to run kubectl and kustomize. I suggest building this image from the cloud builders public repo. The docker file is here:
    https://github.com/GoogleCloudPlatform/cloud-builders-community/tree/master/kustomize
    The second image used is public kaniko image. Now using that specific build is the only way it will function inside of a container. Kaniko is a standalone tool to build container images. Does not require root access to the docker engine like a ‘docker build’ command does. Also notice there is a harbor-config volume that allows kaniko to push to my harbor registry. Please create the secret necessary for your container registry.
    Also notice the kubectl portion is commented out and is only left behind for reference. The Kustomize image contains both kubetctl and kustomize commands.
  3. Last thing to take note of is the commands kustomize uses to create a new deployment.yaml called builddeploy.yaml. This way we can build and tag the container image each time and the deployements will be updated with the new tag. We avoid using “latest” as that can cause issues and is not best practice.

podTemplate(yaml: """
kind: Pod
spec:
  serviceAccountName: jenkins-k8s
  containers:
  - name: kustomize
    image: yourregistry/you/kustomize:3.4
    command:
    - cat
    tty: true
    env:
    - name: IMAGE_TAG
      value: ${BUILD_NUMBER}
  - name: kubectl
    image: gcr.io/cloud-builders/kubectl
    command:
    - cat
    tty: true
    env:
    - name: IMAGE_TAG
      value: ${BUILD_NUMBER}
  - name: kaniko
    image: gcr.io/kaniko-project/executor:debug-539ddefcae3fd6b411a95982a830d987f4214251
    imagePullPolicy: Always
    command:
    - /busybox/cat
    tty: true
    env:
    - name: DOCKER_CONFIG
      value: /root/.docker/
    - name: IMAGE_TAG
      value: ${BUILD_NUMBER}
    volumeMounts:
      - name: harbor-config
        mountPath: /root/.docker
  volumes:
    - name: harbor-config
      configMap:
        name: harbor-config
"""
  ) {

  node(POD_LABEL) {
    def myRepo = checkout scm
    def gitCommit = myRepo.GIT_COMMIT
    def gitBranch = myRepo.GIT_BRANCH
    stage('Build with Kaniko') {
      container('kaniko') {
        sh '/kaniko/executor -f `pwd`/Dockerfile -c `pwd` --skip-tls-verify --destination=yourregistry/you/py-bot:latest --destination=yourregistry/you/py-bot:v$BUILD_NUMBER'
      }
    }
    stage('Deploy and Kustomize') {
      container('kustomize') {
        sh "kubectl -n ${JOB_NAME} get pod"
        sh "kustomize edit set image yourregistry/you/py-bot:v${BUILD_NUMBER}"
        sh "kustomize build > builddeploy.yaml"
        sh "kubectl get ns ${JOB_NAME} || kubectl create ns ${JOB_NAME}"
        sh "kubectl -n ${JOB_NAME} apply -f builddeploy.yaml"
        sh "kubectl -n ${JOB_NAME} get pod"
      }
    }
    // stage('Deploy with kubectl') {
    //   container('kubectl') {
    //     // sh "kubectl -n ${JOB_NAME} get pod"
    //     // sh "kustomize version"
    //     sh "kubectl get ns ${JOB_NAME} || kubectl create ns ${JOB_NAME}"
    //     sh "kubectl -n ${JOB_NAME} apply -f deployment.yaml"
    //     sh "kubectl -n ${JOB_NAME} get pod"
    //   }
    // }
  }   
}

Create a jenkins pipeline and name it however you like, the important part is to set the Pipeline section to “Pipleline script from SCM”. This way Jenkins knows to use the Jenkinsfile in the git repository.

Webhooks and Build Now

Webhooks are what Github uses to push a new build to Jenkins. Due to the constraints of my environment I am not able to do this. My Jenkins instance cannot be contacted by the public API of Github. For now I have to click “Build Now” manually. I do suggest in a fully automated scenario investigating how to configure webhooks so that on every commit you can trigger a new pipeline build.
What the build is successful you should see some lovely green stages like below. In this example there are only 2 stages. Build with Kaniko, this builds the container image and pushes to my internal repo (Harbor). Then Deploy and Kustomize, which takes the new image and updates the 3 deployments in my Kubernetes cluster.

Output from Kubectl:

Quickly Install Cloud Native Storage CSI Driver for vSphere 6.7

First, you really should really truly understand the docs on VMware’s CSI driver.
Cloud Native Storage Getting Started

More information can be found at my GitHub.
https://github.com/2vcps/cns-installer

First if you meet all the pre-requisites mention in the CNS documentation clone my repo:

git clone https://github.com/2vcps/cns-installer.git

Then edit the install.sh and add your credentials and vCenter information.

VCENTER="<vcenter name or IP>" 
VC_ADMIN="<vc admin>" 
VC_PASS="<vc password>" 
VC_DATACENTER="<vc datacentername>" 
VC_NETWORK="<vc vm network name>"

VMware requires all the master to be tainted this way.

MASTERS=$(kubectl get node --selector='node-role.kubernetes.io/master' -o name)
for n in $MASTERS
do
    kubectl taint nodes $n node-role.kubernetes.io/master=:NoSchedule
done
kubectl describe nodes | egrep "Taints:|Name:"

Run the installer shell script (sorry Windows users, install WLS or something)

# ./install.sh

To Remove

Remove all PVC’s created with the Storage Class.

kubectl delete pvc 

Then run the cleanup script.

./uninstall.sh

You can run kubectl get all --all-namespaces to verify it is removed.

Note

If the CSI driver for vSphere does not start, the Cloud Controller may not have untainted the nodes when it initialized. I am have seen it work automatically (as designed by VMware) and also had to run this to make it work:

NODES=$(kubectl get nodes -o name)
for n in $NODES
do
    kubectl taint nodes $n node.cloudprovider.kubernetes.io/uninitialized=true:NoSchedule-
done
kubectl describe nodes | egrep "Taints:|Name:"
vVols Soon?
Pure Storage + CNS + SPBM will be awesome.

Create StorageClass for CNS

Copy and paste the URL any datastore works:
 kind: StorageClass
 apiVersion: storage.k8s.io/v1
 metadata:
   name: cns-vvols
   annotations:
     storageclass.kubernetes.io/is-default-class: \"false\"
 provisioner: csi.vsphere.vmware.com
 parameters:
   # storagepolicyname: \"pure-vvols\"
   DatastoreURL: \"ds:///vmfs/volumes/vvol:373bb977d8ca3de8-a41c2e2c4d1f43e6/\"
   fstype: ext4

Create a new file called cns-vvols.yaml and paste the above yaml. Now you will have the replace the **DatastoreURL** with a datastore that matches your environment. vVols is not currently “supported” but it can work with SPBM policies that point to FlashArrays and have no other policies enabled. Try it out if you like just remember it is not supported and that is why it is commented out.