That one time you all of sudden could not SSH into your Docker Swarm hosts?
I am writing this so I will remember to be smarter next time.
Ever Get this?
minas-tirith:~ jowings$ ssh scarif
@@@@@@@@@@@@@@@@@@@@@@@@@@@@@@@@@@@@@@@@@@@@@@@@@@@@@@@@@@@
@ WARNING: REMOTE HOST IDENTIFICATION HAS CHANGED! @
@@@@@@@@@@@@@@@@@@@@@@@@@@@@@@@@@@@@@@@@@@@@@@@@@@@@@@@@@@@
IT IS POSSIBLE THAT SOMEONE IS DOING SOMETHING NASTY!
I started to flip out and wondered why this just all of sudden happened on all four host in my swarm cluster. Was something actually nasty happening? Probably not, but you never know. I thought I broke the pub key on my mac. because I went into .ssh/known_hosts and removed the entry for my hosts as I quite commonly see this because I rebuild vm’s and hosts all the time. Then I got something different and got the same exact error from my Windows 10 machine.
Permission denied (publickey).Pretty sure I didn’t break 2 different ssh clients on 2 different computers.
What did I do?
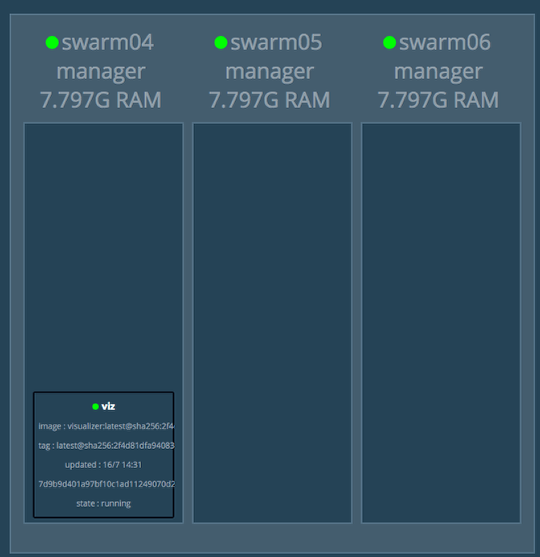
$docker stack deploy -c gitlab.yml gitlab
So I am keeping local git copies and thoughs I would be smart to have Gitlab to run this service in my home lab.
Problem in my zeal to have git use stander ssh tcp port 22 to push my repos up to the server I did this:
version: '3'
services:
web:
image: 'gitlab/gitlab-ce:latest'
restart: always
hostname: 'gitlab1'
environment:
GITLAB_OMNIBUS_CONFIG: |
external_url 'http://gitlab.2vcps.local'
ports:
- '80:80'
- '443:443'
- '22:22'
So basically my gitlab service was now available using tcp/22 on my entire cluster. Even though the container is only on one host they way Docker overlay networking works is any host in that cluster will forward the request for tcp/22 to that container. The container without my public key, the container that no matter my hostname does not have the same SSH “ID” as my actual hosts.
Bad move JO.
So don’t do that and stuff.
To fix:
version: '3'
services:
web:
image: 'gitlab/gitlab-ce:latest'
restart: always
hostname: 'gitlab1'
environment:
GITLAB_OMNIBUS_CONFIG: |
external_url 'http://gitlab.2vcps.local'

ports:
- '80:80'
- '443:443'
- '12022:22'
I changed the port mapping for now. I can use HAPROXY later to use the virtual hostname and point traffic to the container.
$docker stack deploy -c gitlab.yml gitlaband it updates the service with the new port mapping.