OpenStack administrators have to deal with a lot, including, potentially, many different storage backends in Cinder. Pure Storage now make it easier for them to see what is going on with their Pure FlashArray backends.
With so many different storage backends available to OpenStack Cinder administrators who want to understand how their Cinder backends are being utilized have, historically, had to log on to every backend and therefore need to be conversant with all the vendor-specific storage frontends they have in their environment. The OpenStack Horizon GUI is complex enough, without having to learn other GUIs.
Additionally, OpenStack tenants who are interested in their storage utilization and performance have no way of getting this information without raising internal tickets for their storage support teams – and we all know how long those can take to get answered…
Well, Pure Storage has tried to alleviate these problems by providing an OpenStack plugin for Horizon.
From an OpenStack administrators perspective give a high level view of the utilization levels of Pure Storage FlashArrays configured as Cinder backends, and the tenants it will provide real-time volume utilization and performance information.
So what do you get with the plugin?
For the Administrator, there is a new Horizon panel in the Admin / System section called Pure Storage.
In this new panel you get a simple view of your FlashArray backends in the well-known Horizon format. Interesting information such as overall data reduction rates (with and without thin-provisioning included) is given as well as utilization levels against array limits – useful to see for both OpenStack dedicated arrays and those that have multiple workloads.
If you select the actual array name in the table a new browser tab will open at the actual FlashArray GUI if you want to log in directly, however if you select the Cinder Name in the table you get a detailed view of the array in Horizon providing more capacity and performance information.
The Overview pie charts in this detailed view show the array specific limits for this array, so will be different depending on the Purity version of the FlashArray.
If you aren’t an Administrator and just a regular Tenant in OpenStack, you won’t see these options available to you, but you will be able to get more detail on any volumes are using that are backed by Pure Storage FlashArrays.
By selecting a Pure backed volume in your Volumes page you will get enhanced detail information around the utilization, data reduction and performance of your volume. This data is current, so a refresh of the page will update these statistics.
Hopefully, OpenStack Admins and Users will find this new Horizon plugin useful.
To get more details on installing and configuring check out this GitHub repo.
Since the Mitaka release of OpenStack, the Pure Storage Cinder driver has supported Cinder replication, although this first iteration only supported asynchronous replication.
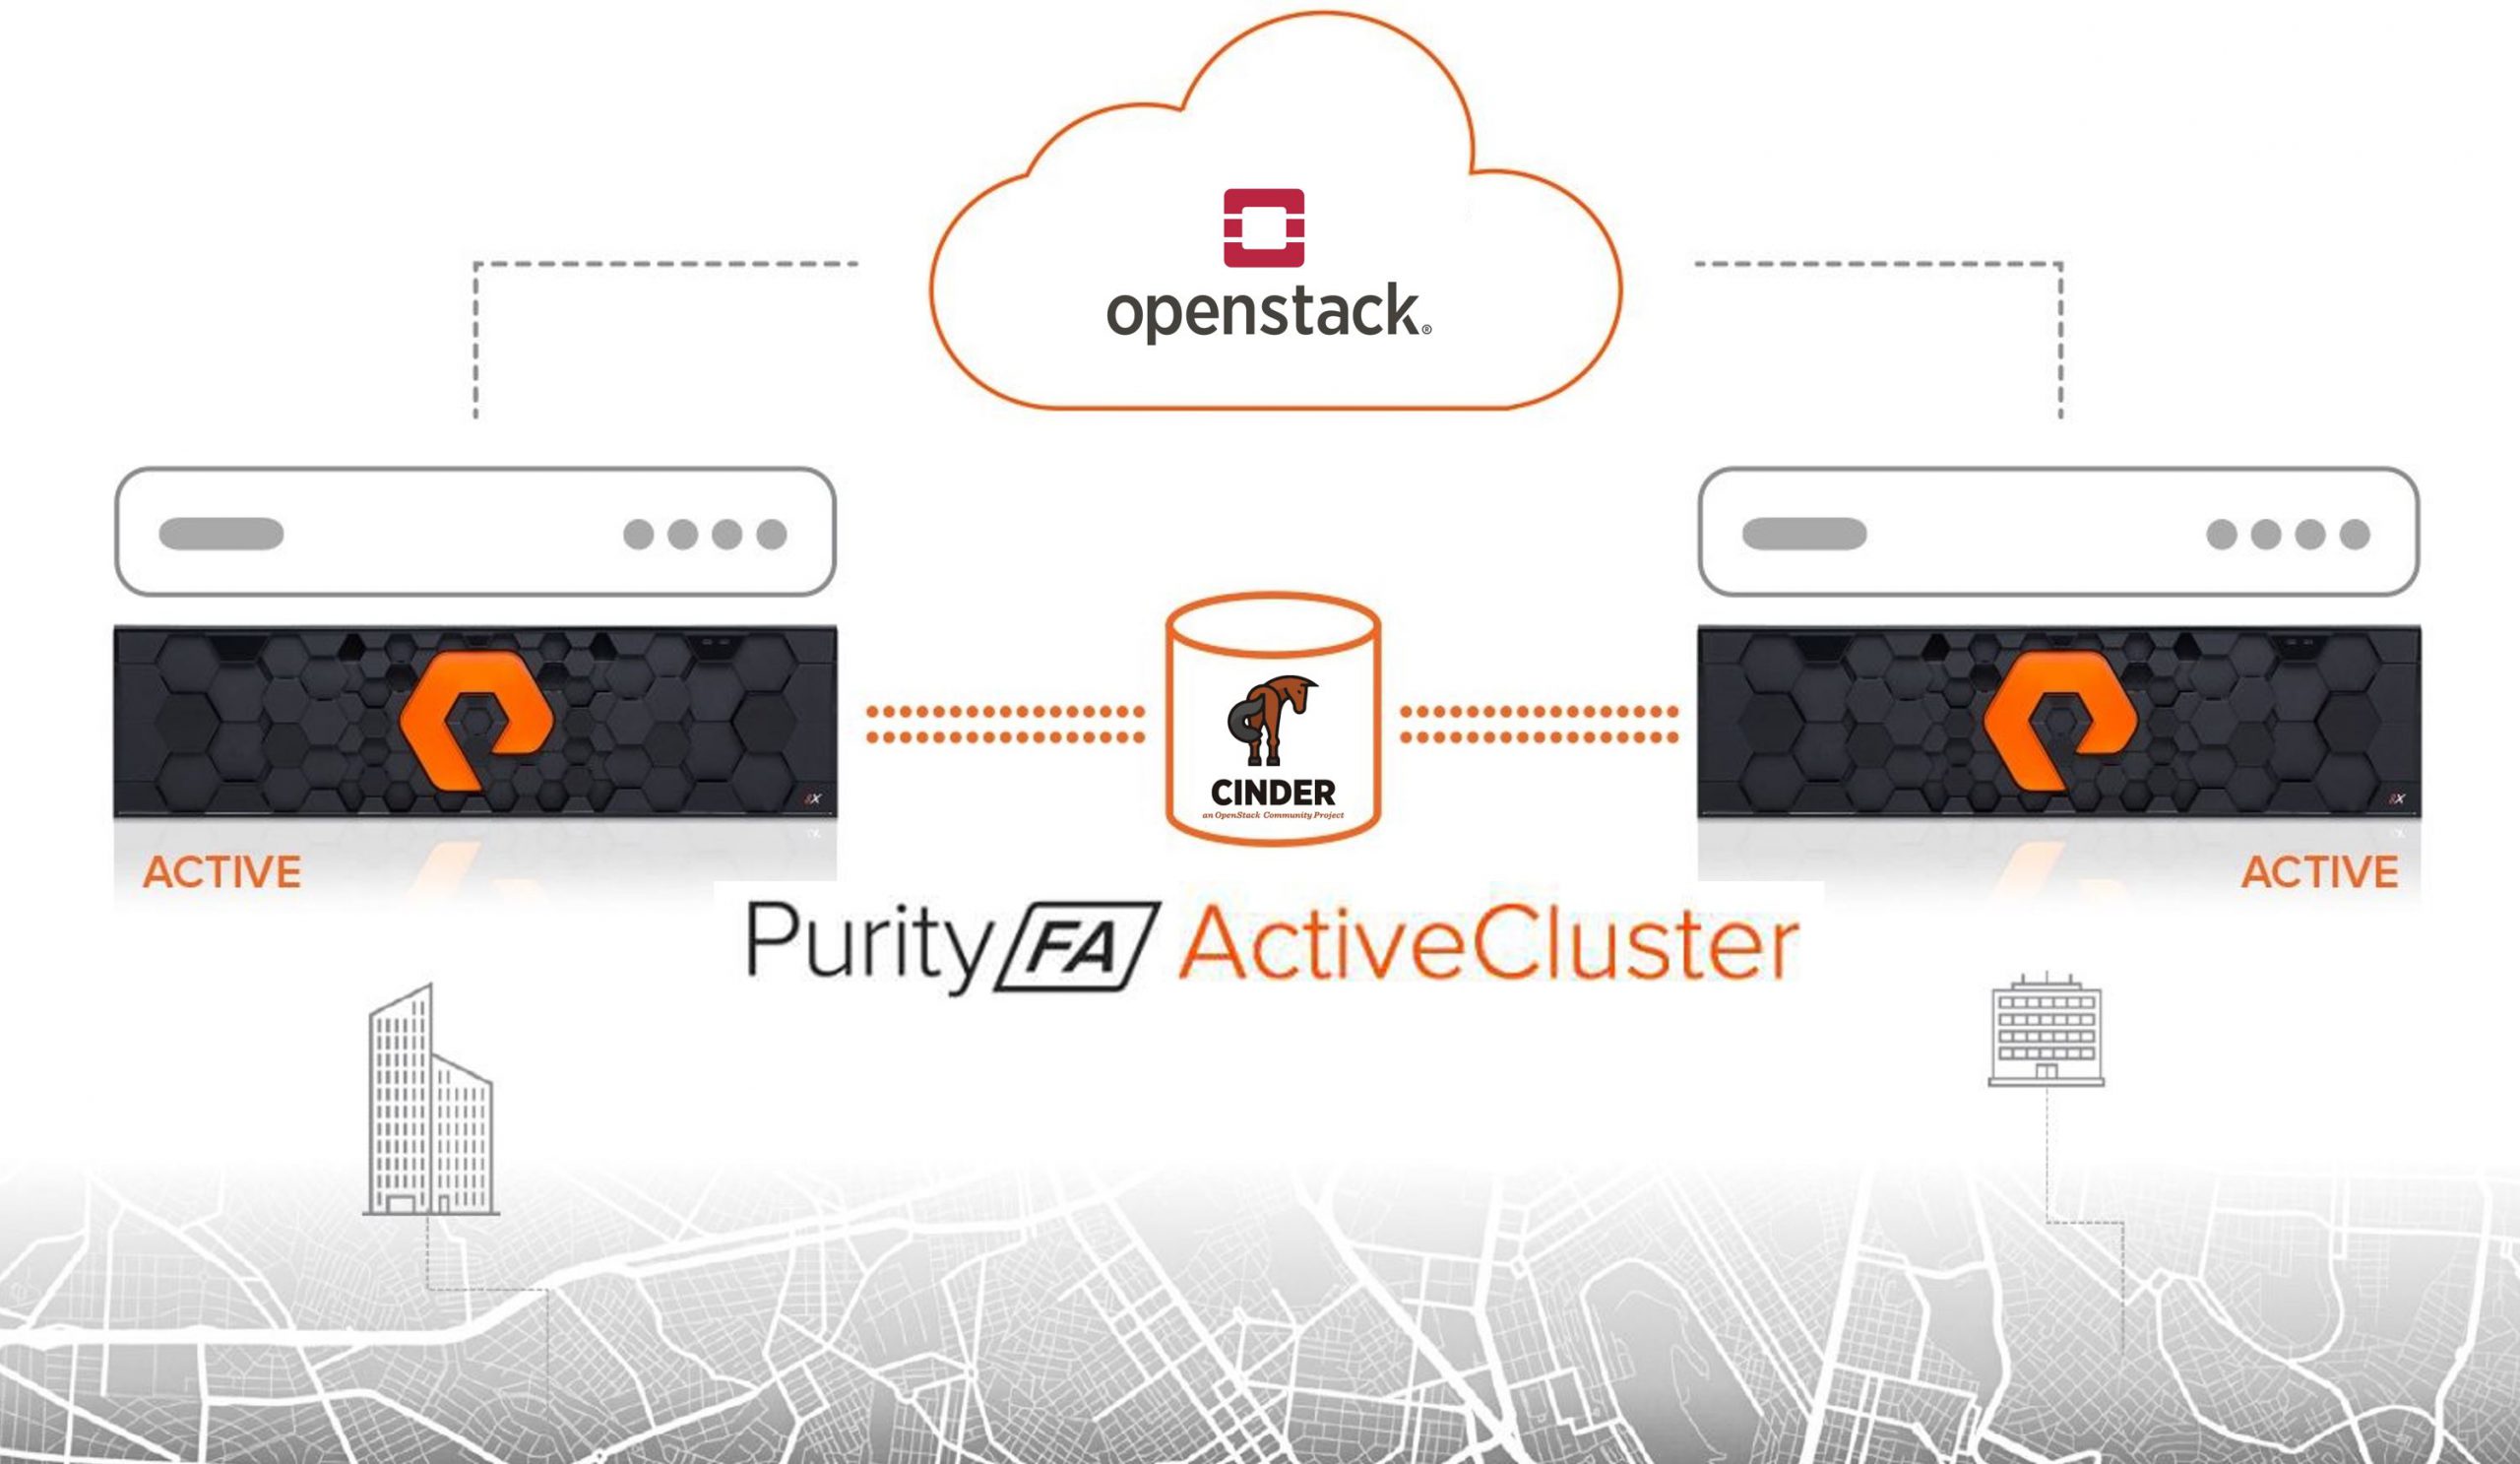
The Rocky release of OpenStack saw Pure’s Cinder driver support synchronous replication by integrating our ActiveCluster feature from the FlashArray.
This synchronous replication automatically created an ActiveCluster pod on the paired FlashArrays called cinder-pod. A pretty obvious name I would say.
While this provided a seamless integration for OpenStack users to create a synchronously replicated volume using a correctly configured volume type, there was one small limitation. ActiveCluster pods were limited to 3000 volumes.
Now you might think that is more than enough volumes for any single ActiveCluster environment. I certainly did until I received a request to be able to support 6000 volumes synchronously replicated.
After some scratching of my head, I remembered that from the OpenStack Stein release of the Pure Cinder driver there is an undocumented (well, not very well documented) parameter that allows the name of the ActiveCluster pod to be customizable and that gave me an idea….
Can you configure Cinder to use the same backend as separate stanzas in the Cinder config file with different parameters?
It turns out the answer is Yes.
So, here’s how to enable your Pure FlashArray Cinder driver to use a single ActiveCluster pair of FlashArrays to allow for 6000 synchronously replicated volumes.
First, we need to edit the cinder.conf file and create two different stanzas for the same array that is configured in an ActiveCluster pair and ensure we have enabled both of these backends:
If we look at the two stanzas, the only difference is that the pure_replication_pod_name is different. I have also set the volume_backend_name to be the same for both configurations. There is a reason for this I will cover later.
After altering the configuration file, make sure to restart your Cinder Volume service to implement the changes.
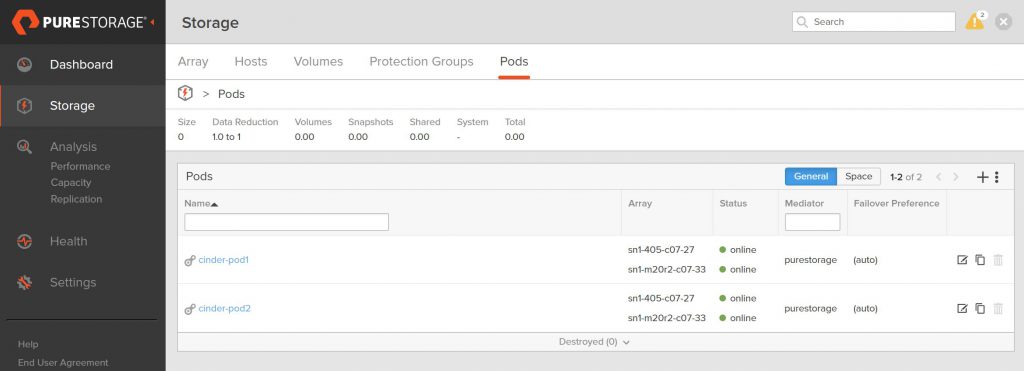
After restarting the cinder-volume service, you will see on the FlashArray that two ActiveCluster pods now exist with the names defined in the configuration file.
This is the first step.
Now we need to enable volume types to be able to use these pods and also to load-balance across the two pods – why load-balance? It just seems to make more sense to make volumes evenly utilize the pods, but there is no specific reason for doing this. If you wanted to use each pod separately, then you would need to set a different volume_backend_name in the Cinder configuration file for each array stanza.
When creating a volume type to use synchronous replication you need to set some specific extra_specs in the type definition. These are the commands to use:
openstack volume type create pure-repl
openstack volume type set --property replication_type=’<in> sync’ pure_repl
openstack volume type set --property replication_enabled=’<is> True’ pure_repl
openstack volume type set --property volume_backend_name=’pure’ pure_repl
The final configuration of the volume type would now look something like this:
 openstack volume type show pure-repl
 +--------------------+-------------------------------------------------------------------------------------------+
 | Field              | Value                                                                                     |
 +--------------------+-------------------------------------------------------------------------------------------+
 | access_project_ids | None                                                                                      |
 | description        | None                                                                                      |
 | id                 | 2b6fe658-5bbf-405c-a0b6-c9ac23801617                                                      |
 | is_public          | True                                                                                      |
 | name               | pure-repl                                                                                 |
 | properties         | replication_enabled='<is> True', replication_type='<in> sync', volume_backend_name='pure' |
 | qos_specs_id       | None                                                                                      |
 +--------------------+-------------------------------------------------------------------------------------------+
Now, all we need to do is use the volume type when creating
our Cinder volumes.
Let’s create two volumes and see how they appear on the FlashArray:
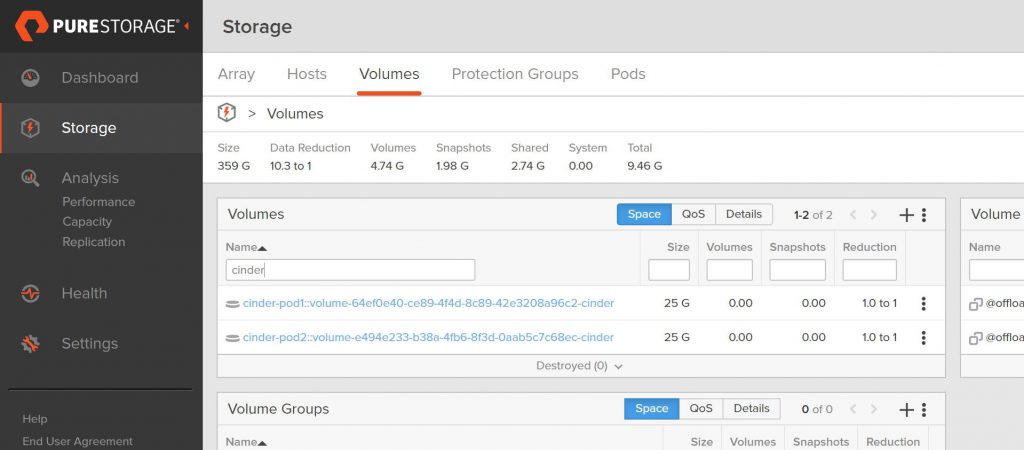
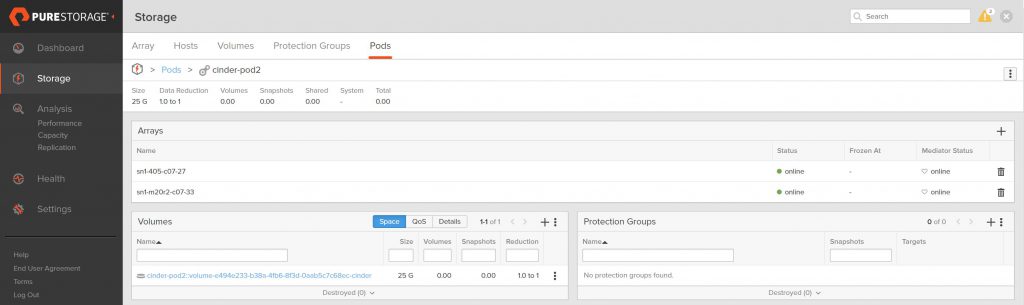
Looking at the FlashArray, we can see the two volumes we just created (I am filtering the volume name on cinder just so you only see the OpenStack related volumes on this array)
The volume naming convention we use at Pure shows that these
volumes are in a pod due to the double colon (::)
in the name and the pod name for each volume is cinder-pod1
and cinder-pod2 respectively.
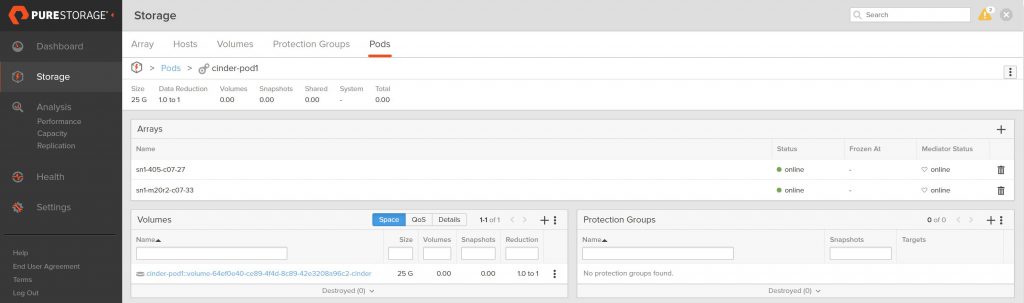
The view of each pod also shows only one volume in each.
If you didn’t want to load-balance across the pods and needed the flexibility to specify the pod a volume exists in, all I need do is set the volume_backend_name to be different in the configuration file array stanzas and then create two volume types. Each would point to the different volume_backend_name setting.