Migrating K8s Stateful Apps with Pure Storage

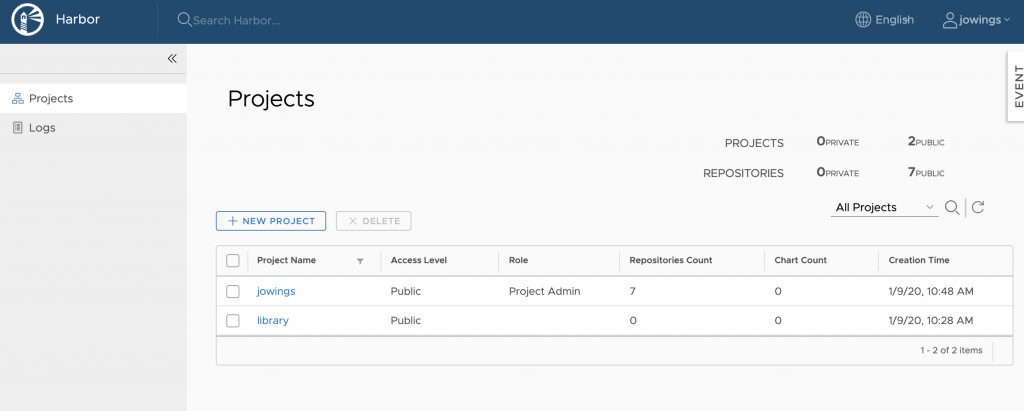
I have to move my harbor instance to a new cluster.

  1. old cluster – find all the PVC’s
kubectl -n harbor get pvc
NAME                                     STATUS   VOLUME                                     CAPACITY   ACCESS MODES   STORAGECLASS   AGE
data-harbor-harbor-redis-0               Bound    pvc-aebe5589-f484-4664-9326-03ff1ffb2fdf   5Gi        RWO            pure-block     24m
database-data-harbor-harbor-database-0   Bound    pvc-b506a2d4-8a65-4f17-96e3-f3ed1c25c56e   5Gi        RWO            pure-block     24m
harbor-harbor-chartmuseum                Bound    pvc-e50b2487-2a88-4032-903d-80df15483c37   100Gi      RWO            pure-block     24m
harbor-harbor-registry                   Bound    pvc-923fa069-21c8-4920-a959-13f7220f5d90   200Gi      RWO            pure-block     24m
  1. clone in the FlashArray
    Find each PVC listed when you run the above command, you may either create a snapshot or a full clone.
  2. Bring up the new app with the same sized PVC’s on your new cluster.
kubectl -n harbor scale deployment --replicas 0 -l app=harbor
  1. scale app to 0 replicas on the new k8s cluster (example above)
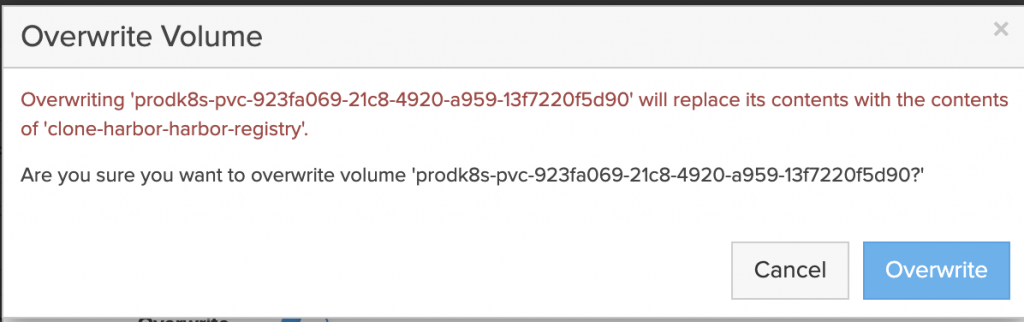
  2. Clone and overwrite each volume on the FlashArray. Using the pvc volume name from the new cluster.
kubectl -n get pvc

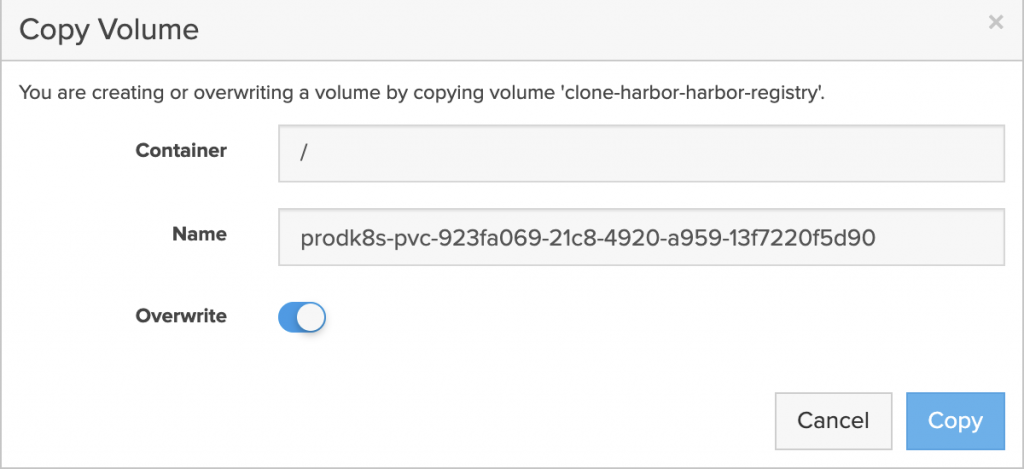
  1. Scale app back to the required replicas. Verify it works.
kuebctl -n harbor scale deployment --replicas 1 -l app=harbor
  1. Point DNS to new loadbalancer/ingress
kubectl -n harbor get ingresses
NAME                    HOSTS                                         ADDRESS         PORTS     AGE
harbor-harbor-ingress   harbor.newstack.local,notary.newstack.local   10.xx.xx.xx  80, 443   32m

Change DNS to the new cluster.

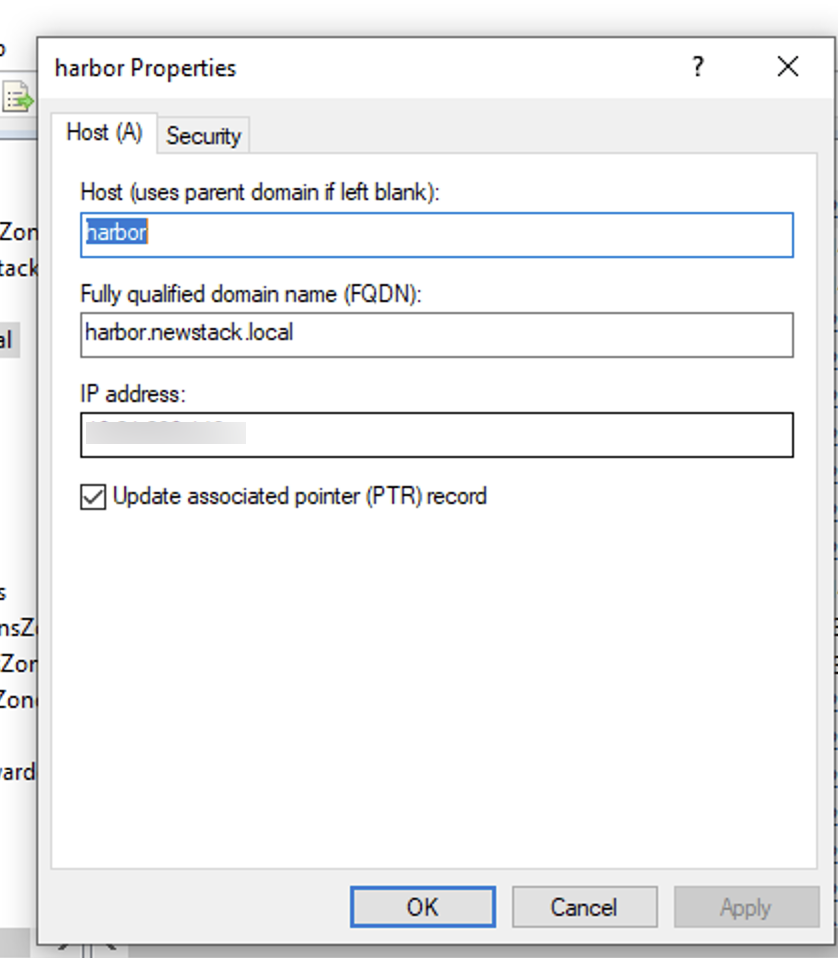
All my data is now migrated

Kubespray and vSphere VMs

I build and destroy Kubernetes clusters nearly weekly. Doing it on VMs makes this super easy. I also need to demo Pure Service Orchestrator so having in guest iSCSI is a must. Following this repo should give any vSphere admin an easy way to learn kubectl, helm and PSO quite easily (of course PSO works with Pure FlashArray and FlashBlade). This uses Terraform to create the VM and Kubespray to install k8s. Ansible can also be used for a few automations of package installs and updates.

I am going to try something new and not recreate the github readme and just share the repo link.

https://github.com/2vcps/tf4vsphere

Pure Storage and Weaveworks Webinar – March 17

I am pretty excited to be doing a webinar with Weaveworks on Weave Kubernetes Platform and Pure Storage. I met Damani at Kubecon and Re:Invent and we have been talking about doing this for months. I am excited to integrate Pure Service Orchestrator and Pure Storage into a platform providing a full collection of what you need to run k8s. Some things we will cover:

  • How the Weave Kubernetes Platform and its GitOps workflows unify deployment, management, and monitoring for clusters and apps
  • How Pure Service Orchestrator accelerates application build and delivery with 6 9’s storage uptime. PSO works for ON PREM and Public Cloud
  • Live Demo – I am going to show some CSI goodness. Promise.
How does Pure make Stateful Apps a no brainer?

Use this link to register now!

Some other important questions you might have from this pic:

When did JO’s beard explode into this?

JO from Pure Storage’s North Georgia foothills HQ

Building the Python Twitter Bot with Jenkins and Kubernetes – part 3

This is the third part of the blogs I have been writing to document building a Python based twitter bot and running it in a container and deploying it to Kubernetes. The first post was about building the python, the second was all about building the docker container and using a deployment in Kubernetes. This last part pulls it all together and lets Github, Jenkins and Kubernetes do the work for you.

Getting Started

Pre-requisites:

  1. Working Kubernetes Cluster
  2. Working Container Registry and your Kubernetes cluster is able to pull images from it.
  3. Jenkins and a service account Jenkins can use to do things in K8s.

Jenkinsfile

Go ahead and fork my repo https://github.com/2vcps/python-twitter-bot to your own github account.
Now looking at the Jenkinsfile below inside of the repo. Some things for your to modify for your environment.

  1. Create a serviceAccount to match the serviceAccountName field in the yaml. This is the permissions the pod building and deploying the bot will use to run during the process. If you get this wrong. There will be errors.
  2. make the the images in the file all exist in your private registry. The first image tag you see is used to run kubectl and kustomize. I suggest building this image from the cloud builders public repo. The docker file is here:
    https://github.com/GoogleCloudPlatform/cloud-builders-community/tree/master/kustomize
    The second image used is public kaniko image. Now using that specific build is the only way it will function inside of a container. Kaniko is a standalone tool to build container images. Does not require root access to the docker engine like a ‘docker build’ command does. Also notice there is a harbor-config volume that allows kaniko to push to my harbor registry. Please create the secret necessary for your container registry.
    Also notice the kubectl portion is commented out and is only left behind for reference. The Kustomize image contains both kubetctl and kustomize commands.
  3. Last thing to take note of is the commands kustomize uses to create a new deployment.yaml called builddeploy.yaml. This way we can build and tag the container image each time and the deployements will be updated with the new tag. We avoid using “latest” as that can cause issues and is not best practice.

podTemplate(yaml: """
kind: Pod
spec:
  serviceAccountName: jenkins-k8s
  containers:
  - name: kustomize
    image: yourregistry/you/kustomize:3.4
    command:
    - cat
    tty: true
    env:
    - name: IMAGE_TAG
      value: ${BUILD_NUMBER}
  - name: kubectl
    image: gcr.io/cloud-builders/kubectl
    command:
    - cat
    tty: true
    env:
    - name: IMAGE_TAG
      value: ${BUILD_NUMBER}
  - name: kaniko
    image: gcr.io/kaniko-project/executor:debug-539ddefcae3fd6b411a95982a830d987f4214251
    imagePullPolicy: Always
    command:
    - /busybox/cat
    tty: true
    env:
    - name: DOCKER_CONFIG
      value: /root/.docker/
    - name: IMAGE_TAG
      value: ${BUILD_NUMBER}
    volumeMounts:
      - name: harbor-config
        mountPath: /root/.docker
  volumes:
    - name: harbor-config
      configMap:
        name: harbor-config
"""
  ) {

  node(POD_LABEL) {
    def myRepo = checkout scm
    def gitCommit = myRepo.GIT_COMMIT
    def gitBranch = myRepo.GIT_BRANCH
    stage('Build with Kaniko') {
      container('kaniko') {
        sh '/kaniko/executor -f `pwd`/Dockerfile -c `pwd` --skip-tls-verify --destination=yourregistry/you/py-bot:latest --destination=yourregistry/you/py-bot:v$BUILD_NUMBER'
      }
    }
    stage('Deploy and Kustomize') {
      container('kustomize') {
        sh "kubectl -n ${JOB_NAME} get pod"
        sh "kustomize edit set image yourregistry/you/py-bot:v${BUILD_NUMBER}"
        sh "kustomize build > builddeploy.yaml"
        sh "kubectl get ns ${JOB_NAME} || kubectl create ns ${JOB_NAME}"
        sh "kubectl -n ${JOB_NAME} apply -f builddeploy.yaml"
        sh "kubectl -n ${JOB_NAME} get pod"
      }
    }
    // stage('Deploy with kubectl') {
    //   container('kubectl') {
    //     // sh "kubectl -n ${JOB_NAME} get pod"
    //     // sh "kustomize version"
    //     sh "kubectl get ns ${JOB_NAME} || kubectl create ns ${JOB_NAME}"
    //     sh "kubectl -n ${JOB_NAME} apply -f deployment.yaml"
    //     sh "kubectl -n ${JOB_NAME} get pod"
    //   }
    // }
  }   
}

Create a jenkins pipeline and name it however you like, the important part is to set the Pipeline section to “Pipleline script from SCM”. This way Jenkins knows to use the Jenkinsfile in the git repository.

Webhooks and Build Now

Webhooks are what Github uses to push a new build to Jenkins. Due to the constraints of my environment I am not able to do this. My Jenkins instance cannot be contacted by the public API of Github. For now I have to click “Build Now” manually. I do suggest in a fully automated scenario investigating how to configure webhooks so that on every commit you can trigger a new pipeline build.
What the build is successful you should see some lovely green stages like below. In this example there are only 2 stages. Build with Kaniko, this builds the container image and pushes to my internal repo (Harbor). Then Deploy and Kustomize, which takes the new image and updates the 3 deployments in my Kubernetes cluster.

Output from Kubectl:

Py-bot in a Container

So during Pure kickoff last week I did several sessions on Pure Storage and Kubernetes for our yearly Tech Summit. It was very fun to prepare for. I wanted to do something different and I decided to take my py-bot I was running on my raspberry pi and up-level with integration into K8s and the FlashBlade with PVC’s. This is the second post and covers how to build the docker container and deploy to k8s.

Image result for twitter
tweet tweet

Check out the repo on github: https://github.com/2vcps/python-twitter-bot

Take a look at the code in ./bots

  • autoreply.py – code to reply to mentions
  • config.py – sets the API connection
  • followFollowers_data.py – Follows anyone that follows you, then writes some of their recent tweets to a CSV on a pure-file FlashBlade filesystem
  • followFollowers.py – All the followback with no data collection
  • tweetgamescore.py – future
  • tweetgamesetup.py – future

Py-bot In Kubernetes

Prereqs

Step 1

Build the docker image and push to your own repo. Make sure you are authenticated to your internal repo.

$ docker build -t yourrepo/you/py-bot:v1 .
$ docker push yourrepo/you/py-bot:v1

Step 2

Create a secret in your k8s environment with the keys are variables. Side note: this is the only methond I found to not break the keys when storing in K8s. If you have a functioning way to do it better let me know.

edit env-secret.yaml with your keys from twitter and the search terms.

kubectl apply -f env-secret.yaml

Verify the keys are in your cluster.

kuebctl describe secret twitter-api-secret

Step 3

Edit deployment.yaml and deploy the app. In my example I have 3 different deployments and one pvc. If you play to not capture data make sure to change the followback deployment to launch followFollowers.py and not followFollowers_data.py. Addiotionally, remove the PVC information if you are not using it.

Be sure to change the image for each deployemnt to your local repository path.
Notice that the autoreply deployment uses the env variable searchkey2 and favretweet deployment will use searchkey1. This allows each app to seach on different terms.

Be careful, if you are testing the favretweet.py program and use a common word for search you will see many many likes and retweets.

Now deploy

kubectl apply -f deployment.yaml

kubectl get pod

NAME                          READY   STATUS    RESTARTS   AGE
autoreply-df85944d5-b9gs9     1/1     Running   0          47h
favretweet-7758fb86c7-56b9q   1/1     Running   0          47h
followback-75bd88dbd8-hqmlr   1/1     Running   0          47h

kubectl logs favretweet-7758fb86c7-56b9q

INFO:root:API created
INFO:root:Processing tweet id 1229439090803847168
INFO:root:Favoriting and RT tweet Day off. No pure service orchestrator today. Close slack Jon, do it now.
INFO:root:Processing tweet id 1229439112966311936
INFO:root:Processing tweet id 1229855750702424066
INFO:root:Favoriting and RT tweet In Pittsburgh. Taking about... Pure Service Orchestrator. No surprise there.  #PSO #PureStorage
INFO:root:Processing tweet id 1229855772789460992
INFO:root:Processing tweet id 1230121679881371648
INFO:root:Favoriting and RT tweet I nearly never repost press releases, but until I can blog on it.  @PureStorage and Pure Service Orchestrator join… https://t.co/A6wxvFUUY7
INFO:root:Processing tweet id 1230121702509531137

kuebctl logs followback-75bd88dbd8-hqmlr

INFO:root:Waiting... 300s
INFO:root:Retrieving and following followers
INFO:root:purelyDB
INFO:root:PreetamZare
INFO:root:josephbreynolds
INFO:root:PureBob
INFO:root:MercerRowe
INFO:root:will_weeams
INFO:root:JeanCarlos237
INFO:root:dataemilyw
INFO:root:8arkz

More info

My Blog 2vcps.io

Follow me @jon_2vcps

Python Twitter Bot

So during Pure kickoff last week I did several sessions on Pure Storage and Kubernetes for our yearly Tech Summit. It was very fun to prepare for. I wanted to do something different and I decided to take my py-bot I was running on my raspberry pi and up-level with integration into K8s and the FlashBlade with PVC’s. This first post is to just go over the python code and how it works and what you need to do to get it working for yourself.

Check out the repo on github: https://github.com/2vcps/python-twitter-bot

Py-Bot

This is a Twitterbot. Built to run on Kubernetes and also uses Pure Service Orchestrator for persistent data.
Take a look at the code in ./bots

  • autoreply.py – code to reply to mentions
  • config.py – sets the API connection
  • followFollowers_data.py – Follows anyone that follows you, then writes some of their recent tweets to a CSV on a pure-file FlashBlade filesystem
  • followFollowers.py – All the followback with no data collection
  • tweet_game_score.py – future
  • tweet_game_setup.py – future

Testing the code on your machine

Prereqs

  • python3
  • twitter account with API keys
  • Pure Service Orchestrator and working Kubernetes

Step 1
$ pip install -r requirements.txt

Step 2
Create env variables for each key. The config.py will pull from the local OS. In this case your local machine.

export CONSUMER_KEY='some key'
export CONSUMER_SECRET='some secret'
export ACCESS_TOKEN='some token'
export ACCESS_TOKEN_SECRET='some token secret'

For the autoreply.py and favretweet.py you need a search key too.

export SEARCH_KEY='the thing I search for'

Be careful, if you are testing the favretweet.py program and use a common word for search you will see many many likes and retweets.

Step 3
Run the code.If all is working you will see logs and action on twitter.

$ python ./bots/autoreply.py 
Example output:

INFO:root:API createdINFO:root:Retrieving mentions
INFO:root:1222564855921758209
INFO:root:Searching for purestorage kubernetes
INFO:root:Retrieving mentionsINFO:root:1222564855921758209
INFO:root:Waiting...


It will continue to run so hit control-C to exit.

Now it is time to impress your boss and use big words like kubernetes. Read on in the next post below about how to run this bot as a deployment in kubernetes.

Image result for dilbert kubernetes

Go to the next level:
Run py-bot in Kubernetes

Quickly Install Cloud Native Storage CSI Driver for vSphere 6.7

First, you really should really truly understand the docs on VMware’s CSI driver.
Cloud Native Storage Getting Started

More information can be found at my GitHub.
https://github.com/2vcps/cns-installer

First if you meet all the pre-requisites mention in the CNS documentation clone my repo:

git clone https://github.com/2vcps/cns-installer.git

Then edit the install.sh and add your credentials and vCenter information.

VCENTER="<vcenter name or IP>" 
VC_ADMIN="<vc admin>" 
VC_PASS="<vc password>" 
VC_DATACENTER="<vc datacentername>" 
VC_NETWORK="<vc vm network name>"

VMware requires all the master to be tainted this way.

MASTERS=$(kubectl get node --selector='node-role.kubernetes.io/master' -o name)
for n in $MASTERS
do
    kubectl taint nodes $n node-role.kubernetes.io/master=:NoSchedule
done
kubectl describe nodes | egrep "Taints:|Name:"

Run the installer shell script (sorry Windows users, install WLS or something)

# ./install.sh

To Remove

Remove all PVC’s created with the Storage Class.

kubectl delete pvc 

Then run the cleanup script.

./uninstall.sh

You can run kubectl get all --all-namespaces to verify it is removed.

Note

If the CSI driver for vSphere does not start, the Cloud Controller may not have untainted the nodes when it initialized. I am have seen it work automatically (as designed by VMware) and also had to run this to make it work:

NODES=$(kubectl get nodes -o name)
for n in $NODES
do
    kubectl taint nodes $n node.cloudprovider.kubernetes.io/uninitialized=true:NoSchedule-
done
kubectl describe nodes | egrep "Taints:|Name:"
vVols Soon?
Pure Storage + CNS + SPBM will be awesome.

Create StorageClass for CNS

Copy and paste the URL any datastore works:
 kind: StorageClass
 apiVersion: storage.k8s.io/v1
 metadata:
   name: cns-vvols
   annotations:
     storageclass.kubernetes.io/is-default-class: \"false\"
 provisioner: csi.vsphere.vmware.com
 parameters:
   # storagepolicyname: \"pure-vvols\"
   DatastoreURL: \"ds:///vmfs/volumes/vvol:373bb977d8ca3de8-a41c2e2c4d1f43e6/\"
   fstype: ext4

Create a new file called cns-vvols.yaml and paste the above yaml. Now you will have the replace the **DatastoreURL** with a datastore that matches your environment. vVols is not currently “supported” but it can work with SPBM policies that point to FlashArrays and have no other policies enabled. Try it out if you like just remember it is not supported and that is why it is commented out.

Pure Service Orchestrator is Validated for Enterprise PKS

The Pure Service Orchestrator Team is excited to announce that PSO is now validated with PKS Enterprise 1.4. PSO is PKS Partner Ready.

Note: Most of this was written as vSphere Cloud Provider in K8s was transitioned to the Cloud Native Storage CSI driver. Use CNS and CSI when you can, the more stable versions of PKS don’t support CSI by default as the K8s version is older. Use PSO for ReadWriteMany on Pure FlashBlade and CNS for block on FlashArray with VMFS Datastores (vVols coming).

The Pure Service Orchestrator Team is excited to announce that PSO is now validated with PKS Enterprise 1.4. PSO is PKS Partner Ready.

You can find more information on the VMware Marketplace https://marketplace.vmware.com/vsx/solutions/pure-service-orchestrator-2-5-2?ref=search

Learn more about PKS and Pure Storage with these posts:

Installing PSO in PKS with Helm
Installing PSO in PKS with the Operator
Use PKS + VMware SDDC + Pure Storage
Migrating PSO Volumes into vVols and PKS

Why PSO and PKS?

I think it is crucial to understand the options for Storage in Kubernetes first. If you have seen me present in the last 12 months you may have already seen this graphic. When I talk about Hypervisor options I am referring to the vSphere Cloud Provider (and now Cloud Native Storage). At the time you deploy the cluster you provide credentials to contact vCenter and create/manage/destroy persistent volumes on a vSphere Datastore. This option is built into PKS Enterprise. This allows you to create a custom Storage Class per datastore or even use SPBM for provisioning. Yes, that means VMFS and vVols are supported today. There is no validation or certification needed to use this plugin (VCP or CNS) with Pure Storage. Customers of PKS are already doing this today. VCP works very well with vVols. I have advocated at VMworld during my session that this unlocks data mobility options between DIY K8s clusters and PKS (or even between PKS clusters). 

How does PSO fit in with PKS?
If you require “ReadWriteMany” aka RWX. This means I want many scalable containers to all attach to and use a single Persistent Volume Claim. The Pure Storage FlashBlade handles this use case. If you need simplicity in storage management across multiple devices both file and block PSO can consolidate this into a single orchestration layer deployed to any cluster with single command. PSO will also scale to new devices with a single command. Simplifying what was traditionally a very complex portion of a K8s environment.

Use vSphere Cloud Provider and Pure Service Orchestrator Side-by-Side

CNS + Pure Service Orchestrator

Due to the nature of the Storage Classes made by PSO and ones you manually create for VCP/CNS you can provide choice to the end users of PKS with only an initial install effort for the Ops team and nearly zero effort Day 2 onward. For more information please take a look at my post on “Getting Started with PKS” and the “How to install PSO in a PKS Cluster” posts.

The thing that happened was…

So if you follow k8s development at all, you know that CSI became GA at the beginning of 2019. The vSphere Cloud Provider “driver” that is in-tree is now deprecated. VMware is has released Cloud Native Storage, the CSI driver for Kubernetes clusters running on vSphere. This does not change the need for Pure Service Orchestrator for RWX volumes or even possible with in guest iSCSI too. Officially for RWO (read write once) you should be using CNS.

Learn more about PKS and Pure Storage with these posts:
Getting started with Persistent Storage and PKS

Installing PSO in PKS with Helm
Installing PSO in PKS with the Operator
Use PKS + VMware SDDC + Pure Storage
Migrating PSO Volumes into vVols and PKS

New Release: Pure Service Orchestrator 5.0.2

The latest version of the CSI enabled Pure Service Orchestrator is now available. Snaps and Clones for Persistent Volume Claims enables use cases for K8s clusters to now move data between apps and environments. Need to make instant database copies for dev or test? Super easy now.

Since this feature leverages the capabilities of the FlashArray the clones and snaps have zero performance penalty and only consume globally new blocks on the underlying array (saves a ton of space when you make a lot of copies).

Make sure to read more on the Pure Service Orchestrator github repo on what needs to be done to enable these features in your k8s cluster. See below for more information.

CSI Snapshot and Clone features for Kubernetes

For details see the CSI volume snapshot and CSI volume clone.

  1. For snapshot feature, ensure you have Kubernetes 1.13+, the feature gate is enabled via the following Kubernetes feature flag: --feature-gates=VolumeSnapshotDataSource=true
  2. For clone feature, ensure you have Kubernetes 1.15+, Ensure the feature gate is enabled via the following Kubernetes feature flag: --feature-gates=VolumePVCDataSource=true


https://github.com/purestorage/helm-charts/tree/master/pure-csi#csi-snapshot-and-clone-features-for-kubernetes

More on installing the CSI Operator 5.0.2:
https://github.com/purestorage/helm-charts/tree/master/operator-csi-plugin

More on installing the CSI Helm Chart 5.0.2
https://github.com/purestorage/helm-charts/tree/master/pure-csi


I ❤️ Tacos

Look out San Diego! Here we come.

I am excited to be at Kubecon yet again. I think this is my third time. Pure Storage will be in booth S92, come by and see some demos of our CSI plugin. Automating persistent storage is still big need for many K8s clusters. Pure can make it simple, scalable and highly available.

I will be at the booth and around a few sessions so please come and say hello.

Also, ask my all about how Pure will support K8s on VMware in all its various forms.

Come by the booth, see a demo, get a turtle approved reusable straw. Enter to win some cool things.