PSO wrt DKS & UCP

Please welcome Simon making a guest appearance to go through whatever it is this is about. 🙂 – Jon

Got to love those TLAs!!

To demystify the title of this blog, this will be about installing Pure Service Orchestrator (PSO) with Docker Kubernetes Service (DKS).

Specifically, I’ll be talking about PSO CSI driver v5.0.8, running with Docker EE 3.0 and the Universal Control Plane (UCP) 3.2.6, managing Kubernetes 1.14.8.

Let’s assume you have Docker Enterprise 3.0 installed on 3 Linux nodes, in my case they are running Ubuntu 18.04.  You decide you want them to all run the Docker Kubernetes Service (DKS) and have any persistent storage provided by your Pure Storage FlashArray or FlashBlade – how do you go about installing all of these and configuring them?

Pre-Requisites

As we are going to be using PSO with Pure Storage array for the persistent storage, ensure that all nodes that will part of DKS have the following software installed:

  • nfs-common
  • multipath-tools

Install UCP

The first step to getting your DKS environment up is to install the Docker Universal Control Plane (UCP) from the node you will be using as your master.

As PSO supports CSI snapshots, you will want to ensure that when installing UCP, you tell it to open the Kubernetes feature gates, thereby enabling persistent volumes snapshots through PSO.

The command to install UCP is:

# docker container run --rm -it --name ucp \
  -v /var/run/docker.sock:/var/run/docker.sock \
  docker/ucp:latest install --host-address <host IP> \
  --interactive --storage-expt-enabled

If you don’t want to open the feature gates, don’t use the --storage-expt-enabled switch in the install command.

Answer the questions the install asks, wait a few minutes, and voila you have Docker UCP installed and can access it through its GUI at http://<host IP>. Note that you may be prompted to enter your Docker EE license key on the first login.

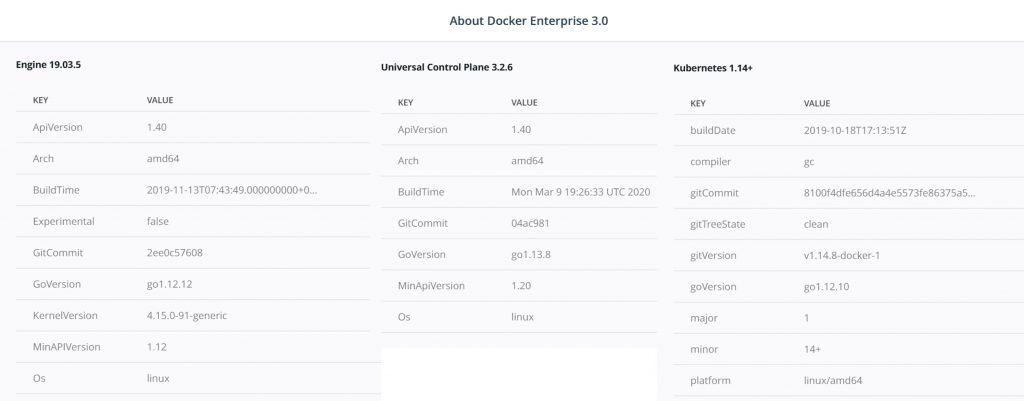
When complete you will have a basic, single node, environment consisting of docker EE 3.0, UCP 3.2.6 and Kubernetes 1.14.8.

Add Nodes to Cluster

Once you have your master node up and running, you can add your two worker nodes to the cluster.

The first step is to ensure your default scheduler is Kubernetes, not Swarm. If you don’t set this pods will not run on the worker nodes due to taints that are applied.

Navigate to your username in the left pane and select Admin Settings and then Scheduler. Set the default Orchestrator type to Kubernetes and save your change

Now to add nodes navigate to Shared Resources and select Nodes and then Add Nodes. You will see something like this:

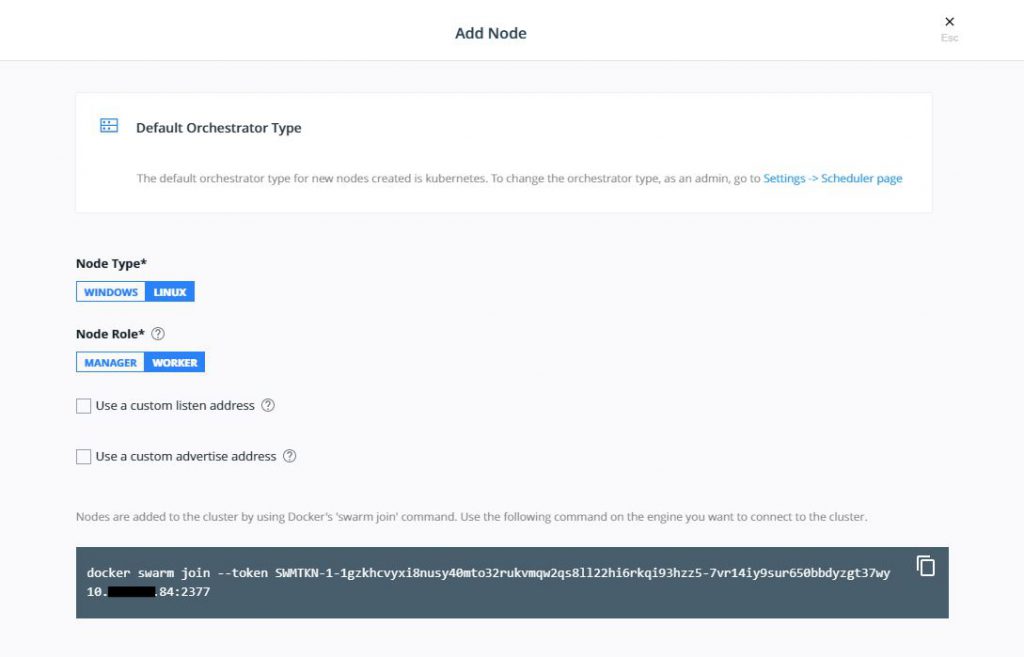
Use the command on each worker node to get them to join the Kubernetes cluster. When complete, your nodes should be correctly joined and look like this is your Nodes display.

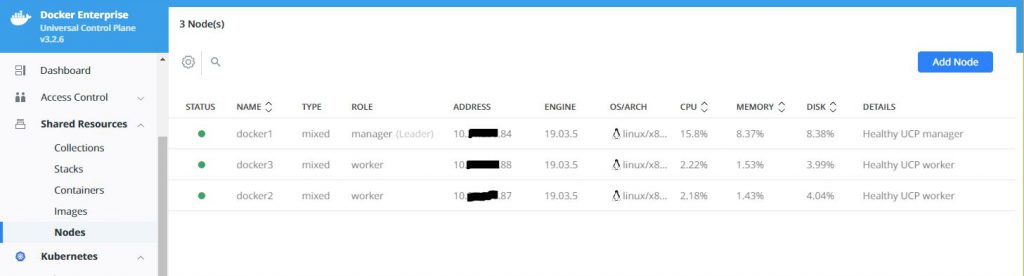
You now have a fully functioning Kubernetes cluster managed by Docker UCP.

Get your client ready

Before you can install PSO you need to install a Docker Client Bundle onto your local node that will be used to communicate with your cluster. I use a Windows 10 laptop, but run the Ubuntu shell provided by Windows to do this.

To get the bundle, navigate to your user profile, select Client Bundles and then Generate Client Bundle from the dropdown menu. Unzip the tar file you get into your working directory.

Next, you need to get the correct kubectl version, which with UCP 3.2.6 is 1.14.8, by running the following commands:

# curl -LO https://storage.googleapis.com/kubernetes-release/release/v1.14.8/bin/linux/amd64/kubectl
# chmod +x ./kubectl
# mv ./kubectl /usr/local/bin/kubectl

Check your installation by running the following commands:

# kubectl version
Client Version: version.Info{Major:"1", Minor:"14", GitVersion:"v1.14.8", GitCommit:"211047e9a1922595eaa3a1127ed365e9299a6c23", GitTreeState:"clean", BuildDate:"2019-10-15T12:11:03Z", GoVersion:"go1.12.10", Compiler:"gc", Platform:"linux/amd64"}
Server Version: version.Info{Major:"1", Minor:"14+", GitVersion:"v1.14.8-docker-1", GitCommit:"8100f4dfe656d4a4e5573fe86375a5324771ec6b", GitTreeState:"clean", BuildDate:"2019-10-18T17:13:51Z", GoVersion:"go1.12.10", Compiler:"gc", Platform:"linux/amd64"}
# kubectl get nodes
NAME      STATUS   ROLES   AGE   VERSION
docker1   Ready    master  24h   v1.14.8-docker-1
docker2   Ready    <none>  24h   v1.14.8-docker-1
docker3   Ready    <none>  24h   v1.14.8-docker-1

Now we are nearly ready to install PSO, but PSO requires Helm, so now we install Helm3 (I’m using v3.1.2 here, but check for newer versions) and validate:

# wget https://get.helm.sh/helm-v3.1.2-linux-amd64.tar.gz
# tar -zxvf helm-v3.1.2-linux-amd64.tar.gz
# mv linux-amd64/helm /usr/bin/helm
# helm version
version.BuildInfo{Version:"v3.1.2", GitCommit:"d878d4d45863e42fd5cff6743294a11d28a9abce", GitTreeState:"clean", GoVersion:"go1.13.8"}

And finally…

We are ready to install PSO.. Here we are just going to follow the instructions in the PSO GitHub repo, so check in their for updates if you are reading this in my future…

# helm repo add pure https://purestorage.github.io/helm-charts
# helm repo update

So the latest version at this time is 5.0.8, so we should get the values.yaml configuration file that matches this version…

# wget https://raw.githubusercontent.com/purestorage/helm-charts/5.0.8/pure-csi/values.yaml

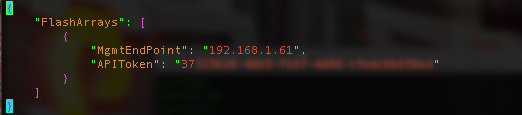
Edit this file to add your site-specific information, especially the information for your backend arrays and eventually install PSO:

# kubectl create namespace <name>
# helm install pure-storage-driver pure/pure-csi --namespace <name> -f ./values.yaml

Done!!

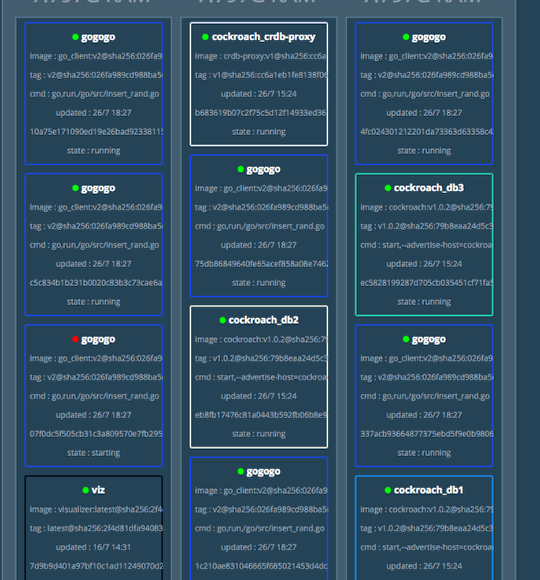
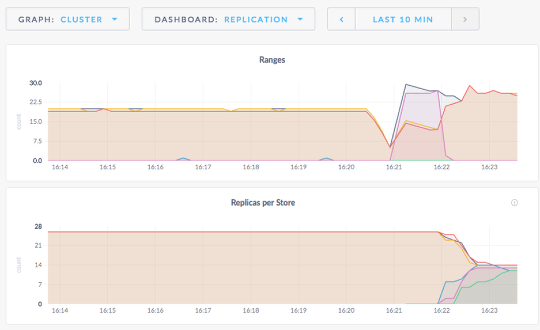
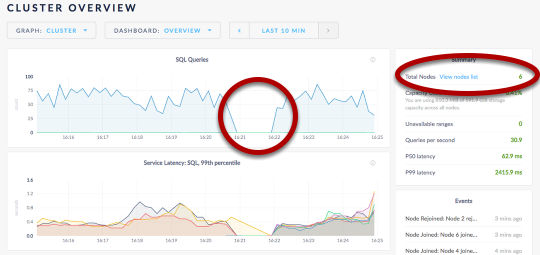
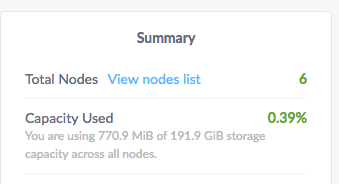
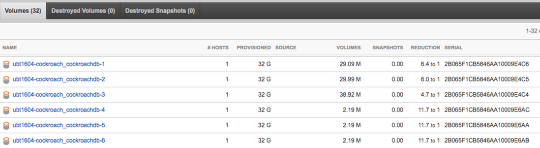
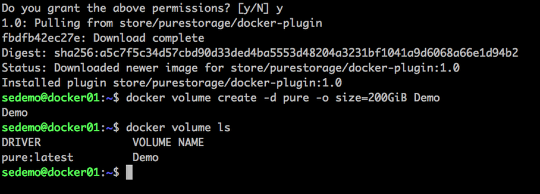
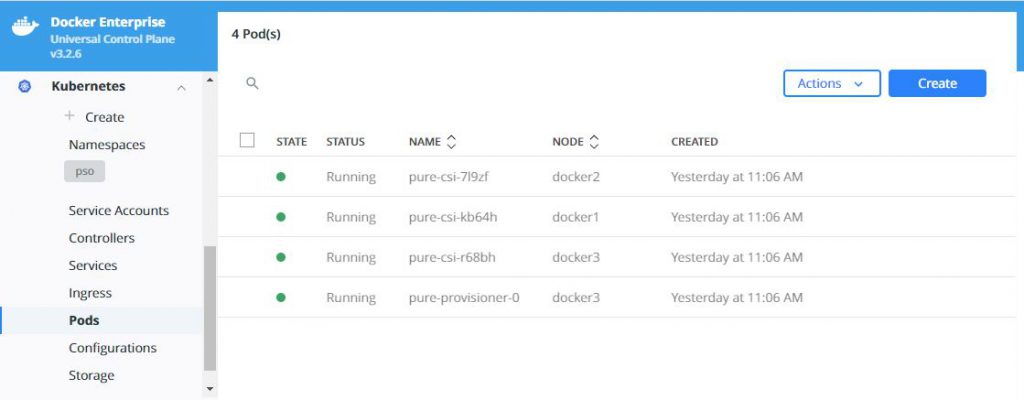
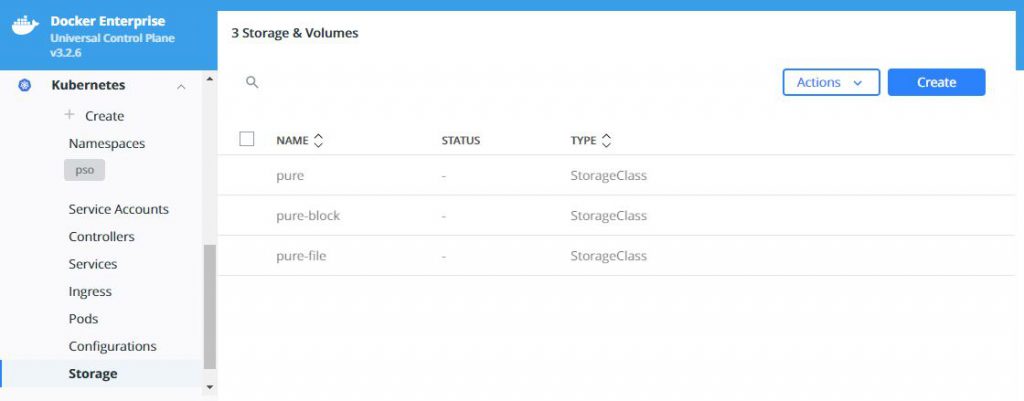
What does this look like in Docker UCP you ask, well this is what you will see in various screens:

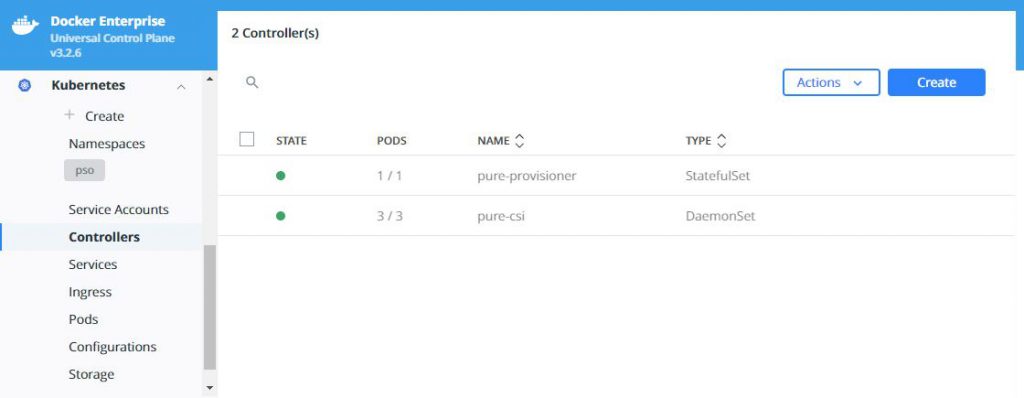
Now you can start using PSO to provide your persistent storage to your containerized applications, and if you enabled the feature-gates as suggested at the start of this blog, you could also take snapshots of your PVs and restore these to new volumes. For details on exactly how to do this read this: https://github.com/purestorage/helm-charts/blob/5.0.8/docs/csi-snapshot-clones.md, but make sure you install the VolumeSnapshotClass first wit this command:

# kubectl apply -f https://raw.githubusercontent.com/purestorage/helm-charts/master/pure-csi/snapshotclass.yaml


The version of Kubernetes provided in Docker UCP 3.2.6 does not support volume cloning, but future releases may enable this functionality – check with Docker UCP and Docker EE release notes.

Building the Python Twitter Bot with Jenkins and Kubernetes – part 3

This is the third part of the blogs I have been writing to document building a Python based twitter bot and running it in a container and deploying it to Kubernetes. The first post was about building the python, the second was all about building the docker container and using a deployment in Kubernetes. This last part pulls it all together and lets Github, Jenkins and Kubernetes do the work for you.

Getting Started

Pre-requisites:

  1. Working Kubernetes Cluster
  2. Working Container Registry and your Kubernetes cluster is able to pull images from it.
  3. Jenkins and a service account Jenkins can use to do things in K8s.

Jenkinsfile

Go ahead and fork my repo https://github.com/2vcps/python-twitter-bot to your own github account.
Now looking at the Jenkinsfile below inside of the repo. Some things for your to modify for your environment.

  1. Create a serviceAccount to match the serviceAccountName field in the yaml. This is the permissions the pod building and deploying the bot will use to run during the process. If you get this wrong. There will be errors.
  2. make the the images in the file all exist in your private registry. The first image tag you see is used to run kubectl and kustomize. I suggest building this image from the cloud builders public repo. The docker file is here:
    https://github.com/GoogleCloudPlatform/cloud-builders-community/tree/master/kustomize
    The second image used is public kaniko image. Now using that specific build is the only way it will function inside of a container. Kaniko is a standalone tool to build container images. Does not require root access to the docker engine like a ‘docker build’ command does. Also notice there is a harbor-config volume that allows kaniko to push to my harbor registry. Please create the secret necessary for your container registry.
    Also notice the kubectl portion is commented out and is only left behind for reference. The Kustomize image contains both kubetctl and kustomize commands.
  3. Last thing to take note of is the commands kustomize uses to create a new deployment.yaml called builddeploy.yaml. This way we can build and tag the container image each time and the deployements will be updated with the new tag. We avoid using “latest” as that can cause issues and is not best practice.

podTemplate(yaml: """
kind: Pod
spec:
  serviceAccountName: jenkins-k8s
  containers:
  - name: kustomize
    image: yourregistry/you/kustomize:3.4
    command:
    - cat
    tty: true
    env:
    - name: IMAGE_TAG
      value: ${BUILD_NUMBER}
  - name: kubectl
    image: gcr.io/cloud-builders/kubectl
    command:
    - cat
    tty: true
    env:
    - name: IMAGE_TAG
      value: ${BUILD_NUMBER}
  - name: kaniko
    image: gcr.io/kaniko-project/executor:debug-539ddefcae3fd6b411a95982a830d987f4214251
    imagePullPolicy: Always
    command:
    - /busybox/cat
    tty: true
    env:
    - name: DOCKER_CONFIG
      value: /root/.docker/
    - name: IMAGE_TAG
      value: ${BUILD_NUMBER}
    volumeMounts:
      - name: harbor-config
        mountPath: /root/.docker
  volumes:
    - name: harbor-config
      configMap:
        name: harbor-config
"""
  ) {

  node(POD_LABEL) {
    def myRepo = checkout scm
    def gitCommit = myRepo.GIT_COMMIT
    def gitBranch = myRepo.GIT_BRANCH
    stage('Build with Kaniko') {
      container('kaniko') {
        sh '/kaniko/executor -f `pwd`/Dockerfile -c `pwd` --skip-tls-verify --destination=yourregistry/you/py-bot:latest --destination=yourregistry/you/py-bot:v$BUILD_NUMBER'
      }
    }
    stage('Deploy and Kustomize') {
      container('kustomize') {
        sh "kubectl -n ${JOB_NAME} get pod"
        sh "kustomize edit set image yourregistry/you/py-bot:v${BUILD_NUMBER}"
        sh "kustomize build > builddeploy.yaml"
        sh "kubectl get ns ${JOB_NAME} || kubectl create ns ${JOB_NAME}"
        sh "kubectl -n ${JOB_NAME} apply -f builddeploy.yaml"
        sh "kubectl -n ${JOB_NAME} get pod"
      }
    }
    // stage('Deploy with kubectl') {
    //   container('kubectl') {
    //     // sh "kubectl -n ${JOB_NAME} get pod"
    //     // sh "kustomize version"
    //     sh "kubectl get ns ${JOB_NAME} || kubectl create ns ${JOB_NAME}"
    //     sh "kubectl -n ${JOB_NAME} apply -f deployment.yaml"
    //     sh "kubectl -n ${JOB_NAME} get pod"
    //   }
    // }
  }   
}

Create a jenkins pipeline and name it however you like, the important part is to set the Pipeline section to “Pipleline script from SCM”. This way Jenkins knows to use the Jenkinsfile in the git repository.

Webhooks and Build Now

Webhooks are what Github uses to push a new build to Jenkins. Due to the constraints of my environment I am not able to do this. My Jenkins instance cannot be contacted by the public API of Github. For now I have to click “Build Now” manually. I do suggest in a fully automated scenario investigating how to configure webhooks so that on every commit you can trigger a new pipeline build.
What the build is successful you should see some lovely green stages like below. In this example there are only 2 stages. Build with Kaniko, this builds the container image and pushes to my internal repo (Harbor). Then Deploy and Kustomize, which takes the new image and updates the 3 deployments in my Kubernetes cluster.

Output from Kubectl:

Pure Service Orchestrator Guide

Over the last few months I have been compiling information that I have used to help customers when it comes to PSO. Using Helm and PSO is very simple, but with so many different ways to setup K8s right now it can require a broad knowledge of how plugins work. I will add new samples and work arounds to this Github repo as I come across them. For now enjoy. I have the paths for volume plugins for Kubespray, Kubeadm, Openshift and Rancher version of Kubernetes. Plus some quota samples and even some PSO FlashArray Snapshot and clone examples.

https://github.com/2vcps/PSO-Guide

A nice picture of some containers because it annoys some people, that makes me think it is funny.

Creating a Helm Repo with Github

Next step in learning helm is being able to take an existing helm package and put it in your own repo.

There are ways to do this with github pages. I don’t really want mess withthat right now, how can I use a Github repo to host my changes to the deployment?

For installing helm and an additional demo please see part 1 of this series.

http://54.88.246.86/2018/03/27/getting-started-with-helm-for-k8s/

Continue reading “Creating a Helm Repo with Github”

My SSH Issue Docker Swarm hosts

That one time you all of sudden could not SSH into your Docker Swarm hosts?

I am writing this so I will remember to be smarter next time.

Ever Get this?

minas-tirith:~ jowings$ ssh scarif
@@@@@@@@@@@@@@@@@@@@@@@@@@@@@@@@@@@@@@@@@@@@@@@@@@@@@@@@@@@
@ WARNING: REMOTE HOST IDENTIFICATION HAS CHANGED! @
@@@@@@@@@@@@@@@@@@@@@@@@@@@@@@@@@@@@@@@@@@@@@@@@@@@@@@@@@@@
IT IS POSSIBLE THAT SOMEONE IS DOING SOMETHING NASTY!

I started to flip out and wondered why this just all of sudden happened on all four host in my swarm cluster. Was something actually nasty happening? Probably not, but you never know. I thought I broke the pub key on my mac. because I went into .ssh/known_hosts and removed the entry for my hosts as I quite commonly see this because I rebuild vm’s and hosts all the time. Then I got something different and got the same exact error from my Windows 10 machine.

Permission denied (publickey).

Pretty sure I didn’t break 2 different ssh clients on 2 different computers.
What did I do?

$docker stack deploy -c gitlab.yml gitlab

So I am keeping local git copies and thoughs I would be smart to have Gitlab to run this service in my home lab.

Problem in my zeal to have git use stander ssh tcp port 22 to push my repos up to the server I did this:

version: '3'
services:
web:
image: 'gitlab/gitlab-ce:latest'
restart: always
hostname: 'gitlab1'
environment:
GITLAB_OMNIBUS_CONFIG: |
external_url 'http://gitlab.2vcps.local'
ports:
- '80:80'
- '443:443'
- '22:22'

So basically my gitlab service was now available using tcp/22 on my entire cluster. Even though the container is only on one host they way Docker overlay networking works is any host in that cluster will forward the request for tcp/22 to that container. The container without my public key, the container that no matter my hostname does not have the same SSH “ID” as my actual hosts.
Bad move JO.
So don’t do that and stuff.

To fix:

version: '3'
services:
web:
image: 'gitlab/gitlab-ce:latest'
restart: always
hostname: 'gitlab1'
environment:
GITLAB_OMNIBUS_CONFIG: |
external_url 'http://gitlab.2vcps.local'

ports:
- '80:80'
- '443:443'
- '12022:22'

I changed the port mapping for now. I can use HAPROXY later to use the virtual hostname and point traffic to the container.

$docker stack deploy -c gitlab.yml gitlab

and it updates the service with the new port mapping.

CockroachDB with Persistent Data

There IS an Official Whitepaper!

While I was writing this post the awesome Simon Dodsley was writing a great whitepaper on Persistent storage with Pure. As you can see there is some very different ways to deploy CockroachDB but the main goal is to keep your important data persistent no matter what happens to the containers as the scale, live and die.

I know most everyone loved seeing the demo of the most mission critical app in my house. I also want to show a few quick ways to leverage the Pure plugin to provide persistent data to a database. I am posting my files I used to create the demo here https://github.com/2vcps/crdb-demo-pure

First note
I started with the instructions provided here by Cockroach Labs.
This is an insecure installation for demo purposes. They do provide the instructions for a more Prod ready version. This is good enough for now.

Second note
The loadbalancer I used was created for my environment using the intructions to output the HAProxy file found here on the Cockroach Labs website:
https://www.cockroachlabs.com/docs/stable/generate-cockroachdb-resources.html

My yaml file refers to a docker image I built for the HAproxy loadbalancer. If it works for you cool! If not please follow the instructions above to create your own. If you really need to know more I can write another post showing how to take the Dockerfile and copy the CFG generated by CRDB into a new image just for you.


My nice little docker swarm

media_1501095950777.png

I have three VMware VM’s running Ubuntu 16.04. With Docker CE and the Pure plugin already installed. Read more here if you want to install the plugin.

media_1501096079095.png

Run the deploy

https://github.com/2vcps/crdb-demo-pure/blob/master/3node-cockroachdb-pure.yml

version: '3.1'
services:
    db1:
      image: cockroachdb/cockroach:v1.0.2
      deploy:
            mode: replicated
            replicas: 1
      ports:
            - 8888:8080
      command: start --advertise-host=cockroach_db1 --logtostderr --insecure
      networks:
            - cockroachdb
      volumes:
            - cockroachdb-1:/cockroach/cockroach-data
    db2:
      image: cockroachdb/cockroach:v1.0.2
      deploy:
         mode: replicated
         replicas: 1
      command: start --advertise-host=cockroach_db2 --join=cockroach_db1:26257 --logtostderr --insecure
      networks:
         - cockroachdb
      volumes:
         - cockroachdb-2:/cockroach/cockroach-data
    db3:
      image: cockroachdb/cockroach:v1.0.2
      deploy:
         mode: replicated
         replicas: 1
      command: start --advertise-host=cockroach_db3 --join=cockroach_db1:26257 --logtostderr --insecure
      networks:
         - cockroachdb
      volumes:
         - cockroachdb-3:/cockroach/cockroach-data
    crdb-proxy:
      image: jowings/crdb-proxy:v1
      deploy:
         mode: replicated
         replicas: 1
      ports:
         - 26257:26257
      networks: 
         - cockroachdb

networks:
    cockroachdb:
        external: true

volumes:
    cockroachdb-1:
      driver: pure
    cockroachdb-2:
      driver: pure
    cockroachdb-3:
      driver: pure


#docker stack deploy -c 3node-cockroachdb-pure.yml cockroach

Like it shows in the compose file This command deploys 4 services. 3 database nodes and 1 HAproxy. Each database node gets a brand new volume attached directly to the path by the Pure Docker Volume Plugin.

New Volumes

media_1501098437804.png

Each new volume created and attached to the host via iSCSI and mounted into the container.

Cool Dashboard

media_1501098544719.png

Other than being no data do you notice something else?
First lets generate some data.
I run this from a client machine but you can attach to one of the DB containers and run this command to generate some sample data.

cockroach gen example-data | cockroach sql --insecure --host [any host ip of your docker swam]

media_1501098910914.png

I am also going to create a “bank” database and use a few containers to start inserting data over and over.

cockroach sql --insecure --host 10.21.84.7
# Welcome to the cockroach SQL interface.
# All statements must be terminated by a semicolon.
# To exit: CTRL + D.
root@10.21.84.7:26257/> CREATE database bank;
CREATE DATABASE
root@10.21.84.7:26257/> set database = bank;
SET
root@10.21.84.7:26257/bank> create table accounts (
-> id INT PRIMARY KEY,
-> balance DECIMAL
-> );
CREATE TABLE
root@10.21.84.7:26257/bank> ^D

I created a program in golang to insert some data into the database just to make the charts interesting. This container starts, inserts a few thousand rows then exits. I run it as a service with 12 replicas so it is constantly going, I call it gogogo because I am funny.

media_1501108005294.png

gogogo

media_1501108062456.png
media_1501108412285.png

You can see the data slowly going into the volumes.

media_1501171172944.png

Each node remains balanced (roughly) as cockroachdb stores that data.

What happens if a container dies?

media_1501171487843.png

Lets make this one go away.

media_1501171632191.png

We kill it.
Swarm starts a new one. The Docker engine uses the Pure plugin and remounts the volume. The CRDB cluster keeps on going.
New container ID but the data is the same.

media_1501171737281.png

Alright what do I do now?

media_1501171851533.png

So you want to update the image to the latest version of Cockroach? Did you notice this in our first screenshot?

Also our database is getting a lot of hits, (not really but lets pretend), so we need to scale it out. What do we do now?

https://github.com/2vcps/crdb-demo-pure/blob/master/6node-cockroachdb-pure.yml

version: '3.1'
services:
    db1:
      image: cockroachdb/cockroach:v1.0.3
      deploy:
            mode: replicated
            replicas: 1
      ports:
            - 8888:8080
      command: start --advertise-host=cockroach_db1 --logtostderr --insecure
      networks:
            - cockroachdb
      volumes:
            - cockroachdb-1:/cockroach/cockroach-data
    db2:
      image: cockroachdb/cockroach:v1.0.3
      deploy:
         mode: replicated
         replicas: 1
      command: start --advertise-host=cockroach_db2 --join=cockroach_db1:26257 --logtostderr --insecure
      networks:
         - cockroachdb
      volumes:
         - cockroachdb-2:/cockroach/cockroach-data
    db3:
      image: cockroachdb/cockroach:v1.0.3
      deploy:
         mode: replicated
         replicas: 1
      command: start --advertise-host=cockroach_db3 --join=cockroach_db1:26257 --logtostderr --insecure
      networks:
         - cockroachdb
      volumes:
         - cockroachdb-3:/cockroach/cockroach-data
    crdb-proxy:
      image: jowings/crdb-haproxy:v2
      deploy:
         mode: replicated
         replicas: 1
      ports:
         - 26257:26257
      networks: 
         - cockroachdb
    db4:
      image: cockroachdb/cockroach:v1.0.3
      deploy:
         mode: replicated
         replicas: 1
      command: start --advertise-host=cockroach_db4 --join=cockroach_db1:26257 --logtostderr --insecure
      networks:
         - cockroachdb
      volumes:
         - cockroachdb-4:/cockroach/cockroach-data
    db5:
      image: cockroachdb/cockroach:v1.0.3
      deploy:
         mode: replicated
         replicas: 1
      command: start --advertise-host=cockroach_db5 --join=cockroach_db1:26257 --logtostderr --insecure
      networks:
         - cockroachdb
      volumes:
         - cockroachdb-5:/cockroach/cockroach-data
    db6:
      image: cockroachdb/cockroach:v1.0.3
      deploy:
         mode: replicated
         replicas: 1
      command: start --advertise-host=cockroach_db6 --join=cockroach_db1:26257 --logtostderr --insecure
      networks:
         - cockroachdb
      volumes:
         - cockroachdb-6:/cockroach/cockroach-data
networks:
    cockroachdb:
        external: true

volumes:
    cockroachdb-1:
      driver: pure
    cockroachdb-2:
      driver: pure
    cockroachdb-3:
      driver: pure
    cockroachdb-4:
      driver: pure
    cockroachdb-5:
      driver: pure
    cockroachdb-6:
      driver: pure
$docker stack deploy -c 6node-cockroachdb-pure.yml cockroach

(important to provide the name of the stack you already used, or else errors)

media_1501172007803.png

We are going to update the services with the new images.

  1. This will replace the container with the new version — v1.0.3
  2. This will attach the existing volumes for nodes db1,db2,db3 to the already created FlashArray volumes.
  3. Also create new empty volumes for the new scaled out nodes db4,db5,db6
  4. CockroachDB will begin replicating the data to the new nodes.
  5. My gogogo client “barage” is still running

This is kind of the shotgun approach in this non-prod demo environment. If you want no downtime upgrades to containers I suggest reading more on blue-green deployments. I will show how to make the application upgrade with no downtime and use blue-green in another post.

Cockroach DB begins to reblance the data.

media_1501172638117.png

6 nodes

media_1501172712079.png

If you notice the gap in the queries it is becuase I updated every node all at once. A better way would be to do one at a time and make sure each node is back up while they “roll” through the upgrade to the new image. Not prod remember?

media_1501172781312.png
media_1501172828992.png

Application says you are using 771MiB of your 192GB. While the FlashArray is using just maybe 105MB across these volumes.

A little while later…

media_1501175811897.png

Now we are mostly balanced with replicas in each db node.

Conclusion
This is just scratching the surface and running highly scalable data applications in containers with persistent data on a FlashArray. Are you a Pure customer or potential Pure customer about to run stateful/persistent apps on Docker/Kubernetes/DCOS? I want to hear from you. Leave a comment or send me a message on Twitter @jon_2vcps.

If you are a developer and have no clue what your infrastructure team does or is doing I am here to help make everyone’s life better. No more weekend long deployments or upgrades. Get out of doing storage performance troubleshooting.

Go to more of your kids soccer games.

Using the Docker Volume Plugin with Docker Swarm

Remember the prerequisites. Check the official README for the latest information. Official README

Platform and Software Dependencies

Operating Systems Supported:

  • CentOS Linux 7.3
  • CoreOS (Ladybug 1298.6.0 and above)
  • Ubuntu (Trusty 14.04 LTS, Xenial 16.04.2 LTS)

Environments Supported :

  • Docker (v1.13 and above)
  • Swarm
  • Mesos 1.8 and above

Other software dependencies:

  • Latest iscsi initiator software for your operating system
  • Latest linux multipath software package for your operating system

Review: To install the plugin –


docker plugin install store/purestorage/docker-plugin:1.0 --alias pure

OR if you are annoyed by having to hit Y for the permissions the plugin requests.


docker plugin install store/purestorage/docker-plugin:1.0 --alias pure --grant-all-permissions

The installation process is the same as a standalone docker host except you must specify your clusterid. This is a unique string you assign to your swarm nodes.


docker plugin disable pure
docker plugin set pure PURE_DOCKER_NAMESPACE=<clusterid>
docker plugin enable pure

When you first install the Pure Volume Plugin the plugin is enabled. Docker will not allow you to modify the namespace while the plugin is in use. So we need to disable the plugin before making changes. This also means it is best to do this before creating and using any volumes.

Remember to put your API token and array management IP in the pure.json file under /etc/pure-docker-plugin/ – for each host.

More information Here

Demo for setting up Swarm and testing container failover

Previous post about installing the Plugin

Pure Storage Docker Plugin

This is a quick guide and how to install the Pure plugin for docker 1.13 and above. For full details check out Pure Volume Plugin on Store.docker.com.

Requirements


Operating Systems Supported

CentOS Linux 7.3
CoreOS (Ladybug 1298.6.0 and above)
Ubuntu (Trusty 14.04 LTS, Xenial 16.04.2 LTS)
Environments Supported

Docker 1.13+ I am on 17.03-ce
Swarm
Mesos 1.8 and above
Other dependencies

Latest iSCSI initiator SW
Latest Multipath package (This made a difference for me on Ubuntu remember to update!)

Hosts Before

media_1501006005257.png

Here I am just listing the Pure hosts on my array before I install the plugin.

Volumes Before

media_1501006035507.png

Also listing out my volumes, these are all pre-existing.

Pull and Install the plugin (Docker 1.13 and above)

Create /etc/pure-docker-plugin/pure.json

media_1501006093681.png

edit the file pure.json in /etc/pure-docker-plugin and add your array and API token
to get a token from the Pure CLI – (or go to the GUI of the array and copy the API token for your user).


pureeadmin create –api-token [user]
pureadmin list –api-token [user] –expose

Pull the plugin and Install

media_1501006156094.png

docker plugin install store/purestorage/docker-plugin:1.0 –alias pure

Grant the plugins to the directories it requests.

Done. Easy.

For Docker Swarm

Setting the PURE_DOCKER_NAMESPACE variable can be done with the command:

docker plugin set pure PURE_DOCKER_NAMESPACE=<clusterid>

My next blog post will dive more into setting up the plugin with Docker Swarm. The clusterid is just a unique string. Keep it simple.

Test it

media_1501006217870.png

$docker volume create -d pure -o size=200GiB Demo

Remember if you want to create the volume with other units the information is in the README but here it is for now:<Units can be specified as xB, xiB, or x. If no units are specified MiB is assumed.

My host created by the plugin

media_1501006373816.png

Now that I created a volume on the array the host docker01 is now added to the list of hosts. The plugin automates adding the iSCSI IQN and creating the host.

My new volume all ready to go

media_1501006405843.png

You also see the docker01-Demo is listed and sized to my requested 200GiB The PURE_DOCKER_NAMESPACE will prepend the volume name you create. The default will use the docker hostname. In a Mesos and Swarm environment the namespace setting mentioned above is used. This is only identified this way on the array.

Now the volume can be mounted to a container using


#docker run –volume Demo:/data [image] [command]
You could also create a new volume and mount it to a container all in the same line with:


#docker run –volume-driver pure –volume myvolume:/data [image] [command]

My First DockerCon

Wrapping up my very first DockerCon. I learned great new things, was introduced to new tech and reconnected with some old friends.

This was my first convention in a very long time where I actually just attended the show and went to sessions. It was really nice. While people would usually read my blog looking for tips and tricks on how to do technical things and not my philosophic rambling. So I won’t try to be a pundit on announcements and competition and all that. Some cool things I learned:

  1. Share everything on GitHub. People use github as the defacto standard for sharing information. Usually it is code, but lots more is out there including presentations and demos for a lot for what happened at DockerCon. Exciting for me as someone that always loved sharing what I learn via this blog is that this is expected. I will post some of my notes and other things about specific sessions once the info is all posted.
  2. Being a “storage guy” for the past 6 years or so between Pure Storage and EMC it was good to see how many companies in the ecosystem have solutions built for CI/CD and Container Security. So much different than other shows where the Storage vendors dominate the mind share.
  3. Over the years friends and co-workers have gone there own way and ended up all over the industry. Some of my favorite people that always put a very high value on community and sharing seem to be the same people that gravitate to DockerCon. It was great to see all of you and meet some new people.

More to follow as I pull my notes together and find links to the sessions.


Kubernetes Anywhere and PhotonOS Template

Experimenting with Kubernetes to orchestrate and manage containers? If you are like me and already have a lot invested in vSphere (time, infra, knowledge) you might be exctied to use Kubernetes Anywhere to deploy it quickly. I won’t re-write the instruction found here:

https://github.com/kubernetes/kubernetes-anywhere

It works with

  • Google Compure Engine
  • Azure
  • vSphere

The vSphere option uses the Photon OS ova to spin up the container hosts and managers. So you can try it out easily with very little background in containers. That is dangerous as you will find yourself neck deep in new things to learn.

Don’t turn on the template!

media_1491484535602.png

If you are like me and *skim* instructions you could be in for hours of “Why do all my nodes have the same IP?” When you power on the Photon OS template the startup sequence generates a machine ID (and mac address). So even though I powered it back off, the cloning processes was producing identical VM’s for my kubernetes cluster. Those not hip to networking this is bad for communication.

Also, don’t try to be a good VMware Admin cad convert that VM to a VM Template. The Kubernetes Anywhere script won’t find it.

IF you do like me and skip a few lines reading (happens right) make sure to check this documenation out on Photon OS. It will help get you on the right track.

https://github.com/vmware/photon/blob/master/docs/photon-admin-guide.md#clearing-the-machine-id-of-a-cloned-instance-for-dhcp

This is clearly marked in the documentation now.