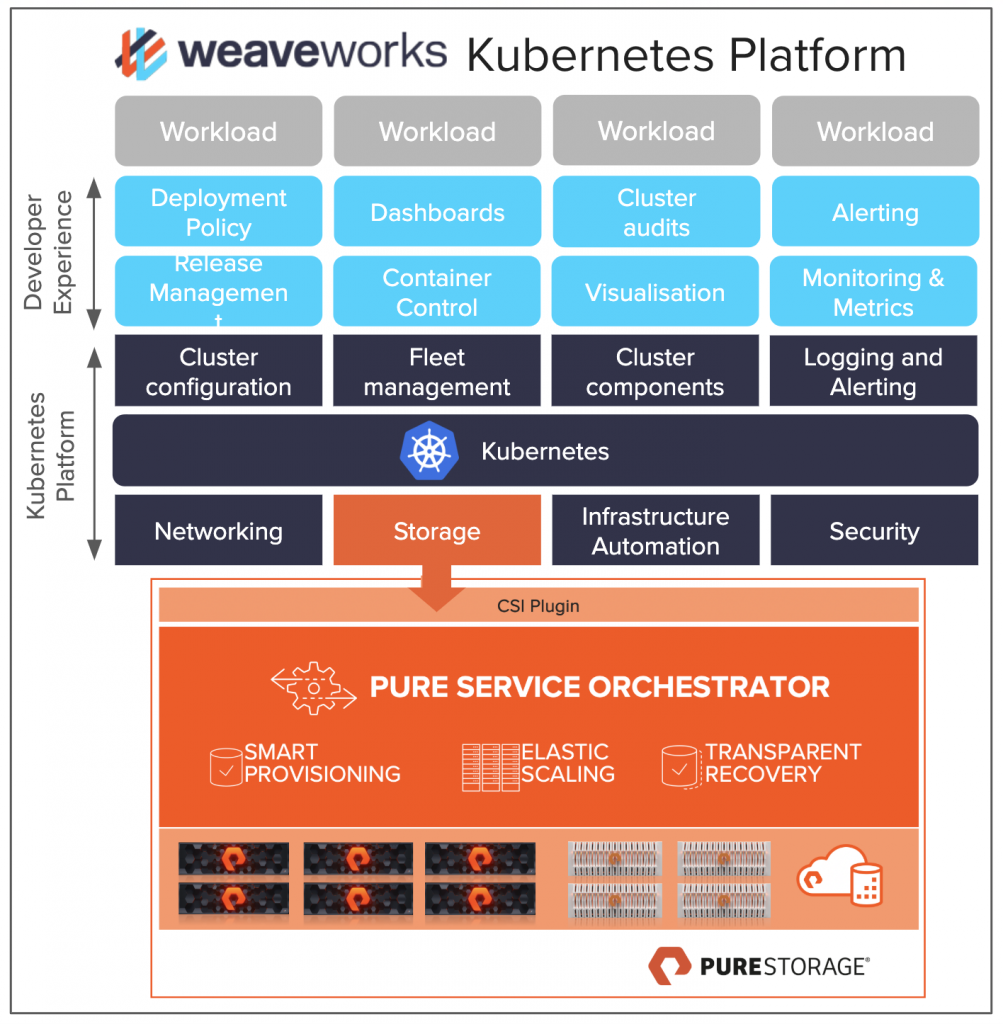
I am pretty excited to be doing a webinar with Weaveworks on Weave Kubernetes Platform and Pure Storage. I met Damani at Kubecon and Re:Invent and we have been talking about doing this for months. I am excited to integrate Pure Service Orchestrator and Pure Storage into a platform providing a full collection of what you need to run k8s. Some things we will cover:
How the Weave Kubernetes Platform and its GitOps workflows unify deployment, management, and monitoring for clusters and apps
How Pure Service Orchestrator accelerates application build and delivery with 6 9’s storage uptime. PSO works for ON PREM and Public Cloud
Live Demo – I am going to show some CSI goodness. Promise.
Working Container Registry and your Kubernetes cluster is able to pull images from it.
Jenkins and a service account Jenkins can use to do things in K8s.
Jenkinsfile
Go ahead and fork my repo https://github.com/2vcps/python-twitter-bot to your own github account. Now looking at the Jenkinsfile below inside of the repo. Some things for your to modify for your environment.
Create a serviceAccount to match the serviceAccountName field in the yaml. This is the permissions the pod building and deploying the bot will use to run during the process. If you get this wrong. There will be errors.
make the the images in the file all exist in your private registry. The first image tag you see is used to run kubectl and kustomize. I suggest building this image from the cloud builders public repo. The docker file is here: https://github.com/GoogleCloudPlatform/cloud-builders-community/tree/master/kustomize The second image used is public kaniko image. Now using that specific build is the only way it will function inside of a container. Kaniko is a standalone tool to build container images. Does not require root access to the docker engine like a ‘docker build’ command does. Also notice there is a harbor-config volume that allows kaniko to push to my harbor registry. Please create the secret necessary for your container registry. Also notice the kubectl portion is commented out and is only left behind for reference. The Kustomize image contains both kubetctl and kustomize commands.
Last thing to take note of is the commands kustomize uses to create a new deployment.yaml called builddeploy.yaml. This way we can build and tag the container image each time and the deployements will be updated with the new tag. We avoid using “latest” as that can cause issues and is not best practice.
podTemplate(yaml: """
kind: Pod
spec:
  serviceAccountName: jenkins-k8s
  containers:
  - name: kustomize
    image: yourregistry/you/kustomize:3.4
    command:
    - cat
    tty: true
    env:
    - name: IMAGE_TAG
      value: ${BUILD_NUMBER}
  - name: kubectl
    image: gcr.io/cloud-builders/kubectl
    command:
    - cat
    tty: true
    env:
    - name: IMAGE_TAG
      value: ${BUILD_NUMBER}
  - name: kaniko
    image: gcr.io/kaniko-project/executor:debug-539ddefcae3fd6b411a95982a830d987f4214251
    imagePullPolicy: Always
    command:
    - /busybox/cat
    tty: true
    env:
    - name: DOCKER_CONFIG
      value: /root/.docker/
    - name: IMAGE_TAG
      value: ${BUILD_NUMBER}
    volumeMounts:
      - name: harbor-config
        mountPath: /root/.docker
  volumes:
    - name: harbor-config
      configMap:
        name: harbor-config
"""
  ) {

  node(POD_LABEL) {
    def myRepo = checkout scm
    def gitCommit = myRepo.GIT_COMMIT
    def gitBranch = myRepo.GIT_BRANCH
    stage('Build with Kaniko') {
      container('kaniko') {
        sh '/kaniko/executor -f `pwd`/Dockerfile -c `pwd` --skip-tls-verify --destination=yourregistry/you/py-bot:latest --destination=yourregistry/you/py-bot:v$BUILD_NUMBER'
      }
    }
    stage('Deploy and Kustomize') {
      container('kustomize') {
        sh "kubectl -n ${JOB_NAME} get pod"
        sh "kustomize edit set image yourregistry/you/py-bot:v${BUILD_NUMBER}"
        sh "kustomize build > builddeploy.yaml"
        sh "kubectl get ns ${JOB_NAME} || kubectl create ns ${JOB_NAME}"
        sh "kubectl -n ${JOB_NAME} apply -f builddeploy.yaml"
        sh "kubectl -n ${JOB_NAME} get pod"
      }
    }
    // stage('Deploy with kubectl') {
    //   container('kubectl') {
    //     // sh "kubectl -n ${JOB_NAME} get pod"
    //     // sh "kustomize version"
    //     sh "kubectl get ns ${JOB_NAME} || kubectl create ns ${JOB_NAME}"
    //     sh "kubectl -n ${JOB_NAME} apply -f deployment.yaml"
    //     sh "kubectl -n ${JOB_NAME} get pod"
    //   }
    // }
  }
}
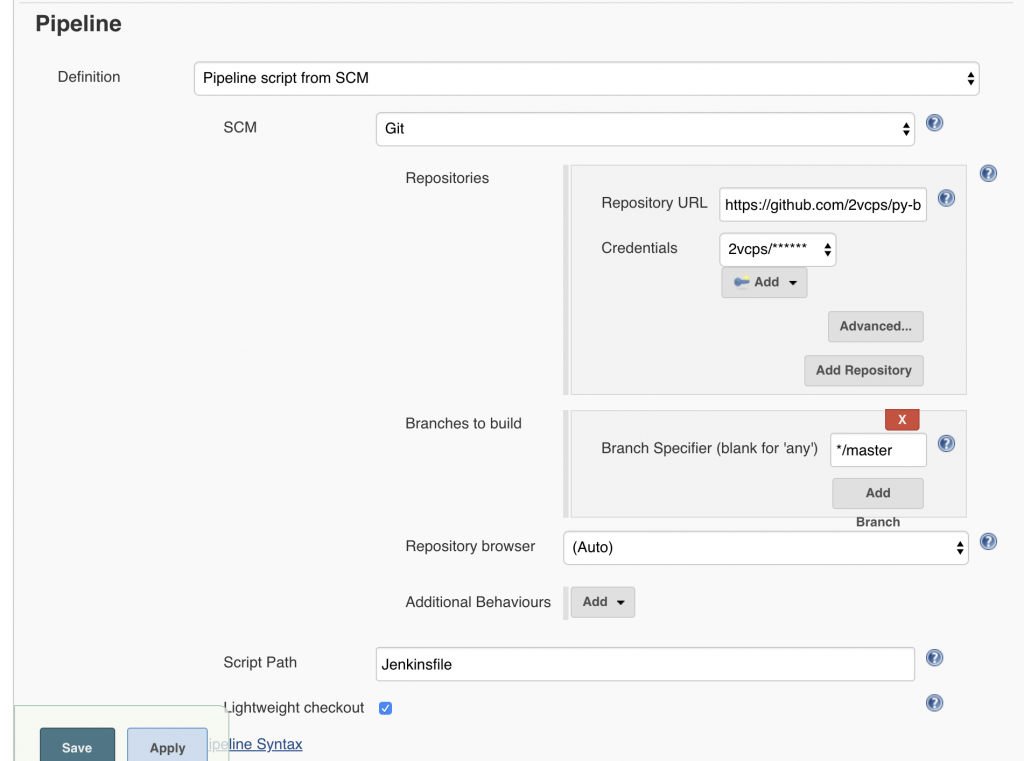
Create a jenkins pipeline and name it however you like, the important part is to set the Pipeline section to “Pipleline script from SCM”. This way Jenkins knows to use the Jenkinsfile in the git repository.
Webhooks and Build Now
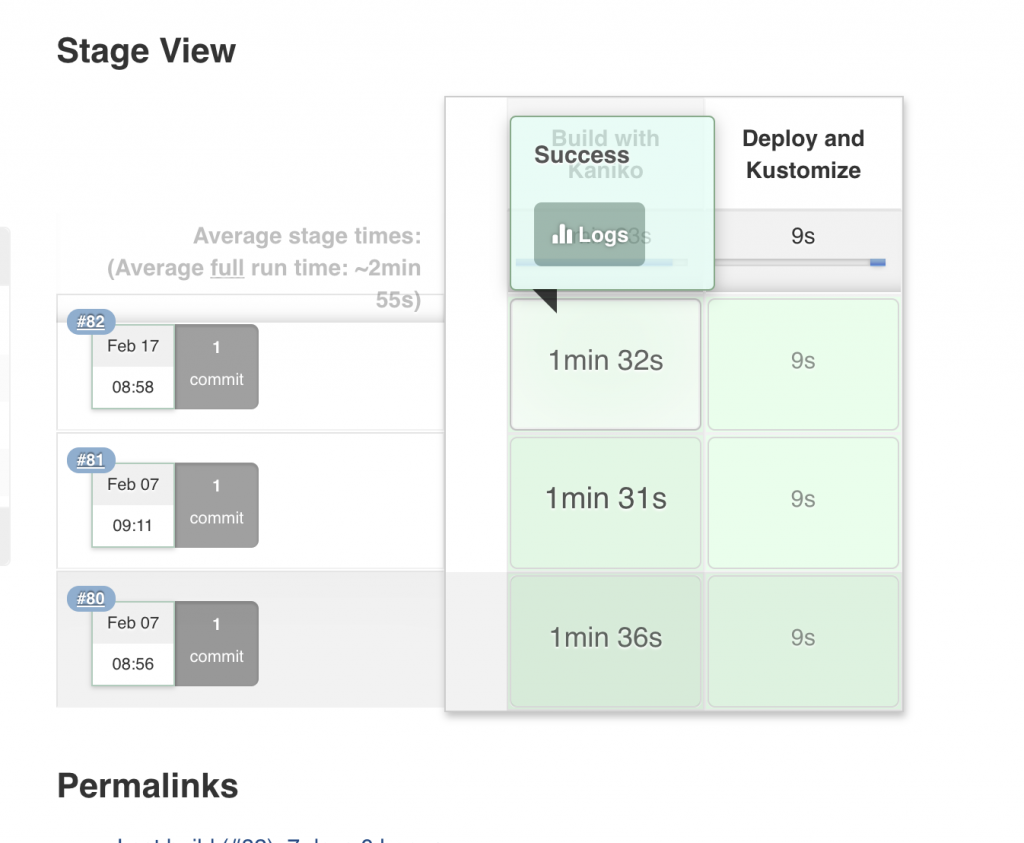
Webhooks are what Github uses to push a new build to Jenkins. Due to the constraints of my environment I am not able to do this. My Jenkins instance cannot be contacted by the public API of Github. For now I have to click “Build Now” manually. I do suggest in a fully automated scenario investigating how to configure webhooks so that on every commit you can trigger a new pipeline build. What the build is successful you should see some lovely green stages like below. In this example there are only 2 stages. Build with Kaniko, this builds the container image and pushes to my internal repo (Harbor). Then Deploy and Kustomize, which takes the new image and updates the 3 deployments in my Kubernetes cluster.
So during Pure kickoff last week I did several sessions on Pure Storage and Kubernetes for our yearly Tech Summit. It was very fun to prepare for. I wanted to do something different and I decided to take my py-bot I was running on my raspberry pi and up-level with integration into K8s and the FlashBlade with PVC’s. This is the second post and covers how to build the docker container and deploy to k8s.
Create a secret in your k8s environment with the keys are variables. Side note: this is the only methond I found to not break the keys when storing in K8s. If you have a functioning way to do it better let me know.
edit env-secret.yaml with your keys from twitter and the search terms.
kubectl apply -f env-secret.yaml
Verify the keys are in your cluster.
kuebctl describe secret twitter-api-secret
Step 3
Edit deployment.yaml and deploy the app. In my example I have 3 different deployments and one pvc. If you play to not capture data make sure to change the followback deployment to launch followFollowers.py and not followFollowers_data.py. Addiotionally, remove the PVC information if you are not using it.
Be sure to change the image for each deployemnt to your local repository path. Notice that the autoreply deployment uses the env variable searchkey2 and favretweet deployment will use searchkey1. This allows each app to seach on different terms.
Be careful, if you are testing the favretweet.py program and use a common word for search you will see many many likes and retweets.
Now deploy
kubectl apply -f deployment.yaml

kubectl get pod

NAME                          READY   STATUS    RESTARTS   AGE
autoreply-df85944d5-b9gs9     1/1     Running   0          47h
favretweet-7758fb86c7-56b9q   1/1     Running   0          47h
followback-75bd88dbd8-hqmlr   1/1     Running   0          47h

kubectl logs favretweet-7758fb86c7-56b9q

INFO:root:API created
INFO:root:Processing tweet id 1229439090803847168
INFO:root:Favoriting and RT tweet Day off. No pure service orchestrator today. Close slack Jon, do it now.
INFO:root:Processing tweet id 1229439112966311936
INFO:root:Processing tweet id 1229855750702424066
INFO:root:Favoriting and RT tweet In Pittsburgh. Taking about... Pure Service Orchestrator. No surprise there.  #PSO #PureStorage
INFO:root:Processing tweet id 1229855772789460992
INFO:root:Processing tweet id 1230121679881371648
INFO:root:Favoriting and RT tweet I nearly never repost press releases, but until I can blog on it.  @PureStorage and Pure Service Orchestrator join… https://t.co/A6wxvFUUY7
INFO:root:Processing tweet id 1230121702509531137

kuebctl logs followback-75bd88dbd8-hqmlr

INFO:root:Waiting... 300s
INFO:root:Retrieving and following followers
INFO:root:purelyDB
INFO:root:PreetamZare
INFO:root:josephbreynolds
INFO:root:PureBob
INFO:root:MercerRowe
INFO:root:will_weeams
INFO:root:JeanCarlos237
INFO:root:dataemilyw
INFO:root:8arkz
Then edit the install.sh and add your credentials and vCenter information.
VCENTER="<vcenter name or IP>"
VC_ADMIN="<vc admin>"
VC_PASS="<vc password>"
VC_DATACENTER="<vc datacentername>"
VC_NETWORK="<vc vm network name>"
VMware requires all the master to be tainted this way.
MASTERS=$(kubectl get node --selector='node-role.kubernetes.io/master' -o name)
for n in $MASTERS
do
    kubectl taint nodes $n node-role.kubernetes.io/master=:NoSchedule
done
kubectl describe nodes | egrep "Taints:|Name:"
Run the installer shell script (sorry Windows users, install WLS or something)
# ./install.sh
To Remove
Remove all PVC’s created with the Storage Class.
kubectl delete pvc
Then run the cleanup script.
./uninstall.sh
You can run kubectl get all --all-namespaces to verify it is removed.
Note
If the CSI driver for vSphere does not start, the Cloud Controller may not have untainted the nodes when it initialized. I am have seen it work automatically (as designed by VMware) and also had to run this to make it work:
NODES=$(kubectl get nodes -o name)
for n in $NODES
do
    kubectl taint nodes $n node.cloudprovider.kubernetes.io/uninitialized=true:NoSchedule-
done
kubectl describe nodes | egrep "Taints:|Name:"
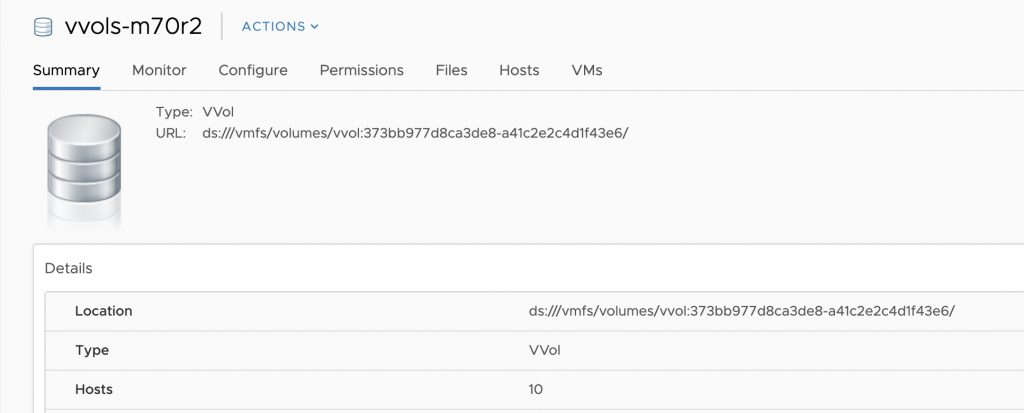
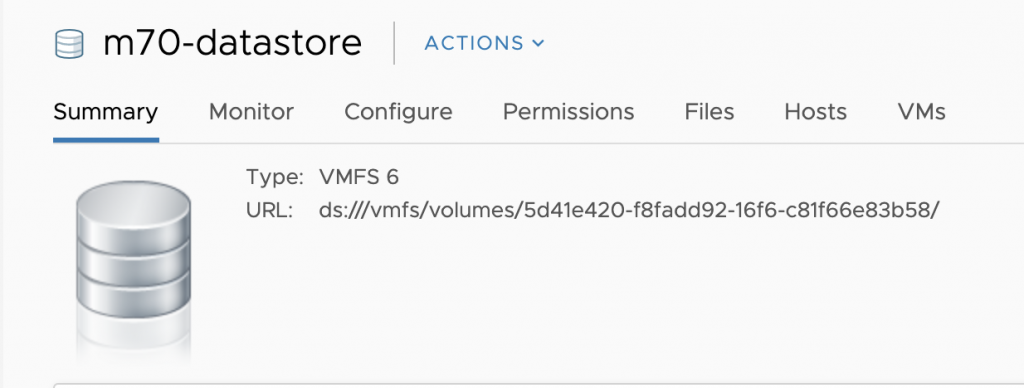
Create a new file called cns-vvols.yaml and paste the above yaml. Now you will have the replace the **DatastoreURL** with a datastore that matches your environment. vVols is not currently “supported” but it can work with SPBM policies that point to FlashArrays and have no other policies enabled. Try it out if you like just remember it is not supported and that is why it is commented out.
The latest version of the CSI enabled Pure Service Orchestrator is now available. Snaps and Clones for Persistent Volume Claims enables use cases for K8s clusters to now move data between apps and environments. Need to make instant database copies for dev or test? Super easy now.
Since this feature leverages the capabilities of the FlashArray the clones and snaps have zero performance penalty and only consume globally new blocks on the underlying array (saves a ton of space when you make a lot of copies).
Make sure to read more on the Pure Service Orchestrator github repo on what needs to be done to enable these features in your k8s cluster. See below for more information.
For snapshot feature, ensure you have Kubernetes 1.13+, the feature gate is enabled via the following Kubernetes feature flag: --feature-gates=VolumeSnapshotDataSource=true
For clone feature, ensure you have Kubernetes 1.15+, Ensure the feature gate is enabled via the following Kubernetes feature flag: --feature-gates=VolumePVCDataSource=true
The last few months I have done a lot of work with NSX-T. I have not done so much networking since my CCNA days. I wanted to share a couple of things that were really helpful I found out on the web.
I was using NSX-T 2.4.2 and sometimes some troubleshooting guides were not very helpful as they were very specific to other versions.
Some helpful information in those few links. Main thing is when you create certificates for NSX-T Manager, you should apply them too.
Also, make sure the NIC’s on your ESXi hosts are all setup the same way. I had 4 nics and 4 different VLAN/Trunk configs, no bueno. Also as VXLAN wants the frames to be at least 1600 MTU. I set everything to 9000 just for fun. That worked much better.
This all started as I was needing a side project. I had purchased a Raspberry Pi 4 in July but was looking for a great way to use it. Then in August I received another Pi 3 from the vExpert Community at VMworld.
I setup the Pi 3 to be an AirPlay speaker for my old basement stereo. What does this have to do with K8s? Nothing.
I took the Pi 4 and purchased 3 more to complete a mini-rack cluster using K3s. https://k3s.io/ this is a crazy easy way to get Kubernetes up and running when you really don’t want to mess with the internals of everything. Perfect for the raspberry pi.
So I know have a single master cluster with 3 worker nodes. Although the master can run workload too… so actually. Four node cluster is best way to describe it.
First was a multi-node deployment of Minio to front end my ancient Iomega Nas. I wrote some Python to take timelapse photos from my PiZero camera and push them into Minio. Pretty cool and should work with any S3 interface (hint hint).
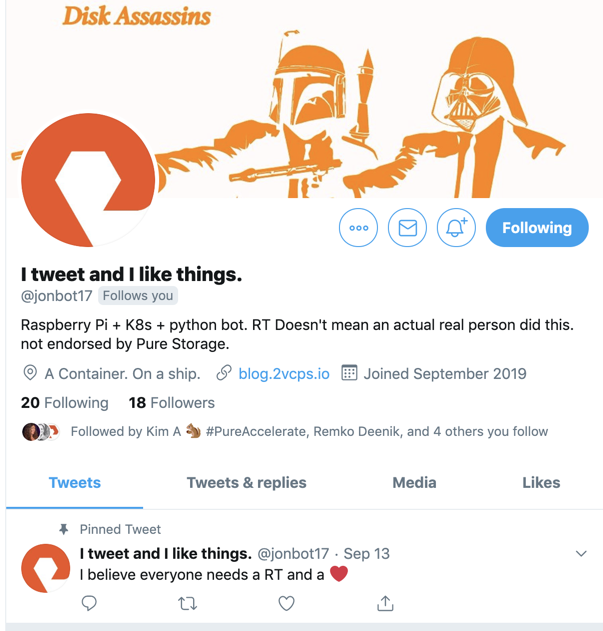
Next was I wanted to make something that could help me do a little more with Python. So I took a look at Tweepy and created a twitter developer account. @Jonbot17 was born.
Take a look at my github page for the code so far.
It Retweets and likes things. It also follows you back if you follow it.
UPDATE: My bot wasn’t just shadow banned but banned banned. So it would retweet any tweet with #PureAccelerate, then the conference started, the account did a little too much activity for twitter. I guess 1000 tweets in a few hours is too much for the platform.
Does anyone have any other ideas of what I should run on my k3s’s and Pi4 cluster?
There was a question on twitter and I thought I would write down my process for others to learn from. First, a little background. Kubernetes is managed mostly using a tool called kubectl (kube-control, kube-cuddle, kube-C-T-L, whatever). This tool will look for the configuration to talk to the API for kubernetes management. A sanitized sample can be seen by running:
You can see there is Clusters, Contexts and Users. The following commands kubectl config get-context and use-context allow you to see and switch contexts. In my use case I have a single context per cluster.
kubectl config get-context
CURRENT   NAME                          CLUSTER      AUTHINFO           NAMESPACE
*         I-AM-GROOT@k8s-ubt18          k8s-ubt18    I-AM-GROOT
          k8s-dev-1-admin@k8s-dev-1     k8s-dev-1    k8s-dev-1-admin
          k8s-lab-1-admin@k8s-lab-1     k8s-lab-1    k8s-lab-1-admin
          k8s-prod-1-admin@k8s-prod-1   k8s-prod-1   k8s-prod-1-admin
kubectl config use-context k8s-dev-1-admin@k8s-dev-1
Switched to context "k8s-dev-1-admin@k8s-dev-1".
Switching this way became cumbersome. So I now use a tool called kubectx and with it kubens. https://github.com/ahmetb/kubectx. Now you can see below my prompt shows my cluster + the namespace. Pretty sweet to see that and has saved me from removing deployments from the wrong cluster. “k8s-dev-1-admin@k8s-dev-1:default”
Now the kubectl tool will look in your environment for a variable KUBECONFIG. Many times this will be set to KUBECONFIG=~/.kube/config . If you modify your .bash_profile on OSX or .bashrc in Ubuntu(and others) you can point that variable anywhere. I formerly had this pointed to a single file for each cluster. For example:
This worked great but a few 3rd party management tools had issues switching between multiple files. At least for me the big one was the kubernetes module for python. So I moved to doing a single combined config file at ~/.kube/config
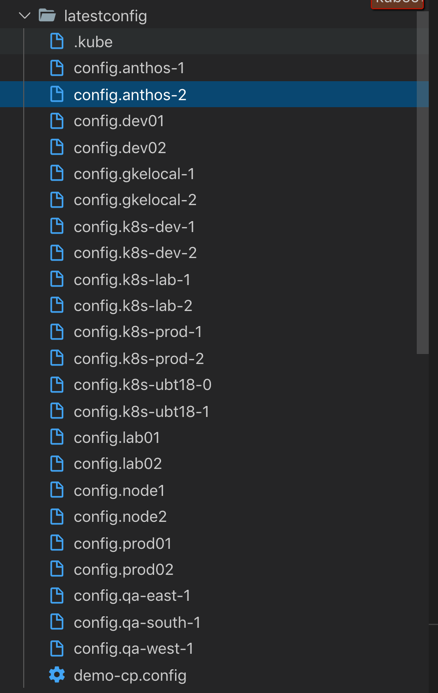
Now what do I do now?
so many configs
Here is my basic workflow. I don’t automate it yet as I don’t want to overwrite something carelessly. 1. Run an ansible playbook that grabs the admin.conf file from /etc/kubernetes on the masters of the cluster. 2. Modify manually the KUBECONFIG environment variable to be KUBECONFIG=~/.kube/config:~/latestconfig/new.config 3. Run kubectl config view –raw to make sure it is all there the –raw tag unhides the keys and such. 4. COPY the ~/.kube/config to ~/.kube/config.something 5. Run kubectl config view –raw > ~/.kube/config 6. Open a new terminal to use my original env variable for KUBECONFIG and make sure all the clusters show up. 7. Clean up old config if I am feeling extra clean.
Not really hard or too complicated. I destroy clusters pretty often so sometimes I will blow away the config and then remerge my current clusters into a new config file.
Only a slight nudge at from @CodyHosterman to put this post together.
Kubernetes deployed into AWS is a method many organizations are using to get into using K8s. Whether you deploy K8s with Kubeadm, Kops, Kubespray, Rancher, WeaveWorks, OpenShift, etc the next big question is how do I do persistent volumes? While EBS has StorageClass integrations you may be interesting in getting better efficiency and reliability than traditional block in the cloud. That is one of the great uses of Cloud Block Store. Highly efficient and highly reliable storage built for AWS with the same experience as the on prem FlashArray. By utilizing Pure Service Orchestrator’s helm chart or operator you can now take advantage of Container Storage as a Service in the cloud. Are you using Kubernetes in AWS on EC2 and have questions about how to take advantage of Cloud Block Store? Please ask me here in the comments or @jon_2vcps on twitter.
Persistent Volume Claims may will not always be 100% full. Cloud Block Store is Deduped, Compressed and Thin. Don’t pay for 100% of a TB if it is only 1% full. I do not want to be in the business of keeping developers from getting the resources they need, but I also do not want to be paying for when they over-estimate.
Migrate data from on prem volumes such as K8s PVC, VMware vVols, Native physical volumes into the cloud and attach them to your Kubernetes environment. See the youtube demo below for an example. What we are seeing in the demo is creating an app in Kubernetes on prem, loading it with some data (photos), replicating that application to the AWS cloud and using Pure Service Orchestrator to attach the data to the K8s orchestrated application using Cloud Block Store. This is my re-working of Simon’s tech preview demo from the original launch of Cloud Block Store last November.
3. Simple. Make storage simple. One common tweet I see on twitter from the Kubernetes detractors is how complicated Kubernetes can be. Pure Service Orchestrator makes the storage layer amazingly simple. A single command line to install or upgrade. Pooling across multiple devices.
Get Started today: Below I will include some links on the different installs of PSO. Now don’t let the choices scare you. Container Storage Interface or CSI is the newest API for common interaction with all storage providers. While flexvol was the original storage solution it makes sense to move forward with CSI. This is very true for newer versions of kubernetes that include CSI by default. So if you are starting to use K8s for the first time today or your cluster is K8s 1.11 we have you covered. Use the links below to see the install process and prerequisites for PSO.
While I discussed in my VMworld session this week some of the architectural decisions to be made while deploying PKS on vSphere my demo revolved around once it is up and running how to move existing data into PKS.
First, using the Pure FlashArray and vVols we are able to automate that process and quickly move data from another k8s cluster into PKS. It is not limited to that but this is the use case I started with.
Part 1 of the demo shows taking the persistent data from a deployment on and cloning it over the vVol that is created by using the vSphere Cloud Provider with PKS. vVols are particularly important because they keep the data in a native format and make copy/replication and snapshotting much easier.
Part 2 is the same process just scripted using Python and Ansible.
Demo Part 1 – Manual process of migrating data into PKS
Demo Part 2 – Using Python and Ansible to migrate data into PKS
How to automate the Migration with some Python and Ansible